
- Home
- Research
- Scientific services
Advanced Light Microscopy Facility
Latest news
- 2023 Rates in effect for the SMOC (01-03-2023 to 29-02-2024)
- Informative Flyer on Equipment available at SMOC
- Informative Flyer on Super Resolution Informational at SMOC
Presentation
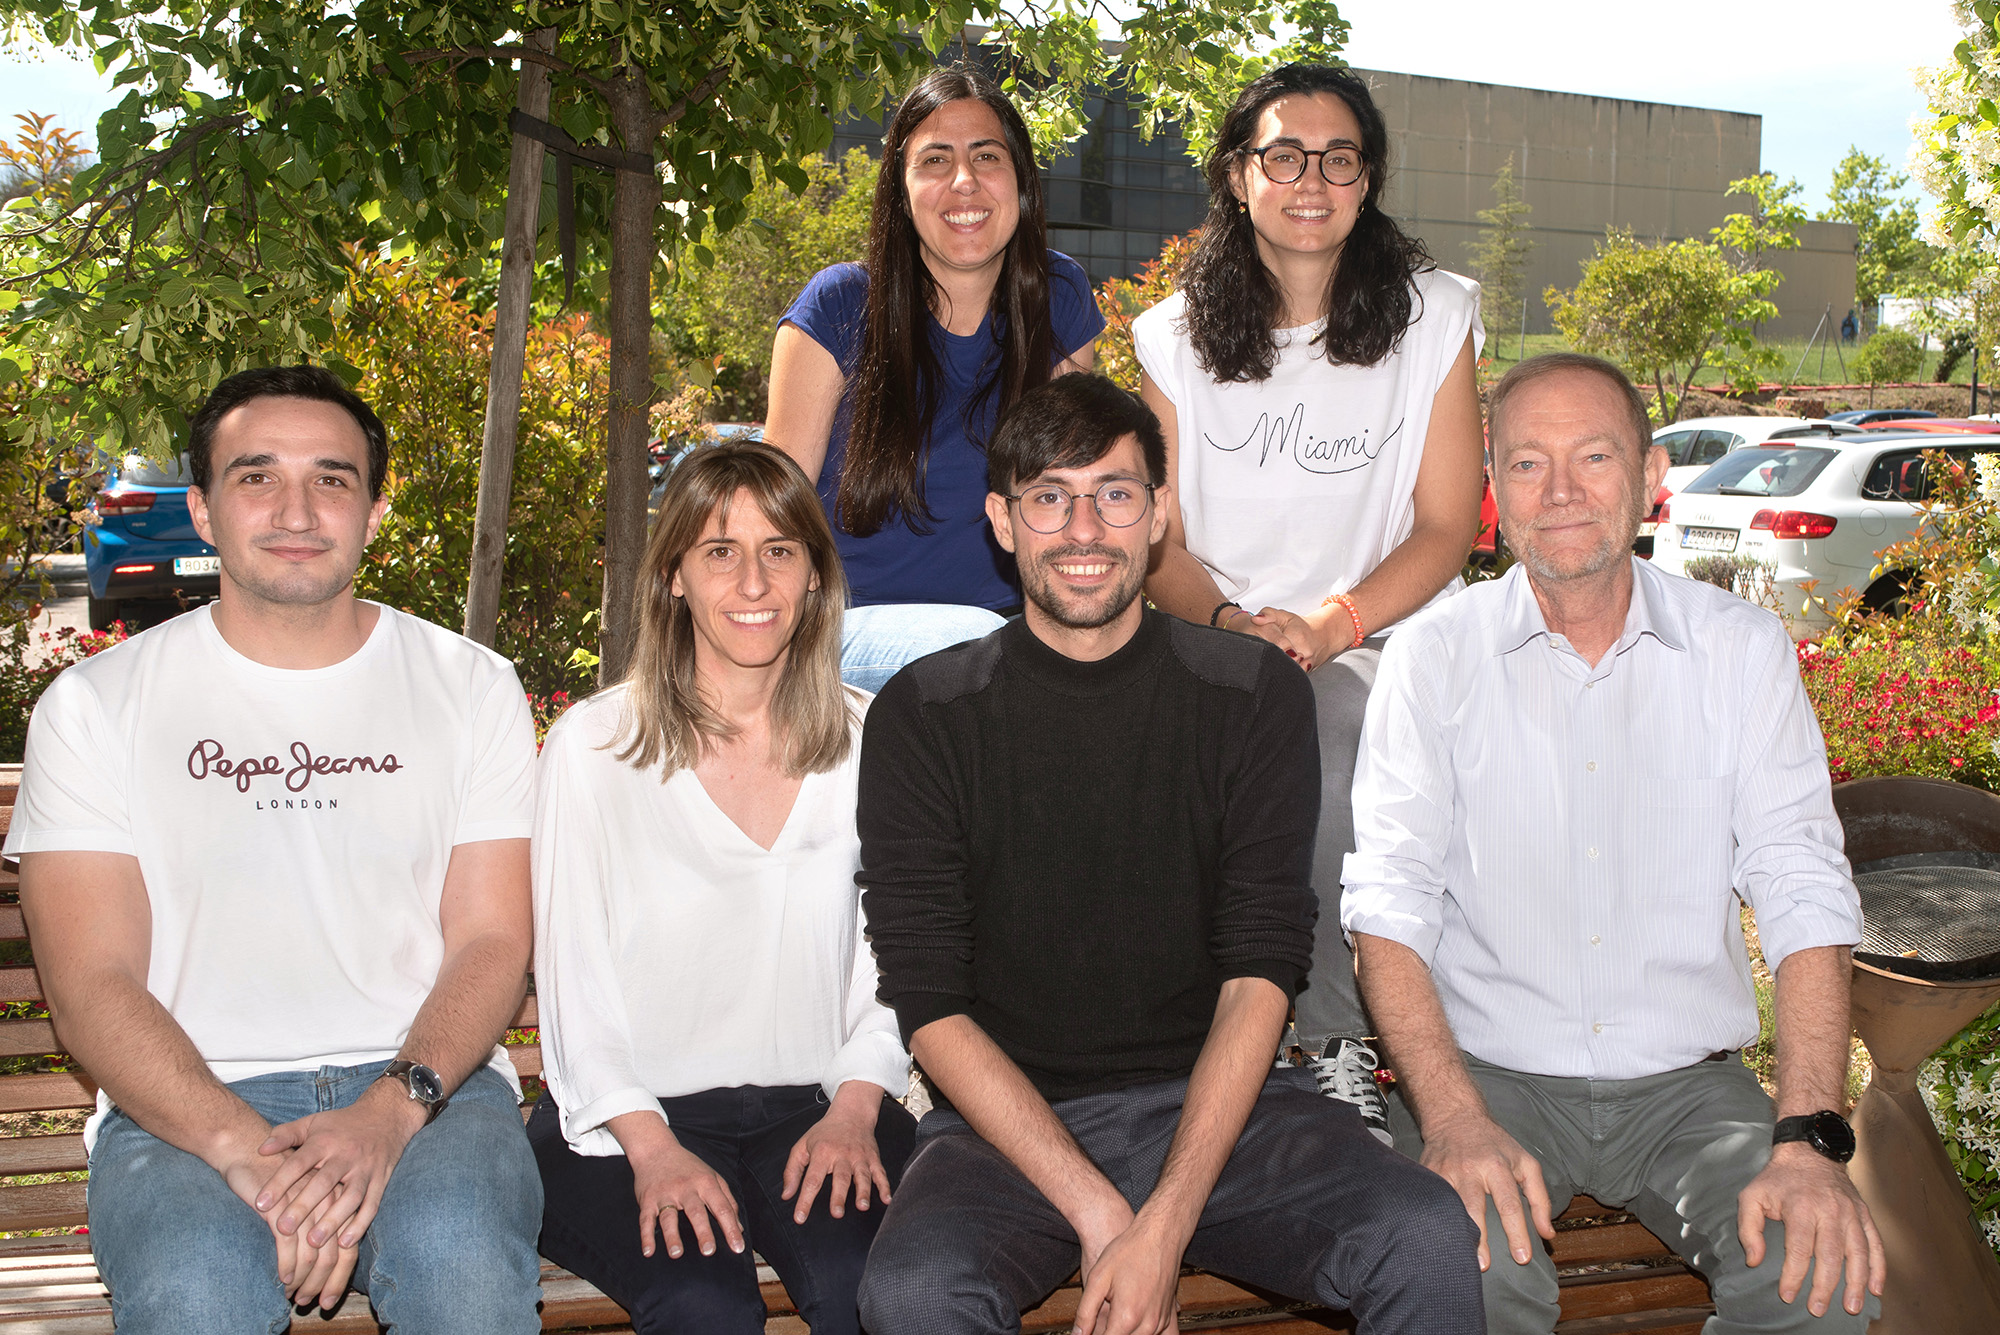
Since 1999, the Advanced Light Microscopy Facility (SMOA) has been in charge of the maintenance and management of the use of the advanced optical microscopy systems of the Centro de Biología Molecular Severo Ochoa (CBM), with a base of more than 300 annual users belonging to the CBM, as well as to other public and private organizations.
Our facility offers advice, support and training through the organization of theoretical-practical seminars on advanced microscopy techniques and image analysis.
Likewise, it is also in charge of the distribution of reagents and consumables related to microscopy, and the search for resources to acquire new systems that meets the demands of the different users of the CBM.
As a central scientific facility in the CBM, although it does not carry out any scientific research work, the SMOC has the following systems:
- 6 Laser scanning confocal microscopy (LSM) systems.
- 1 Spinning disk confocal microscopy system (SDCM).
- 1 Confocal microscopy system with a super-resolution stimulated emission depletion module (STED) and a fluorescence lifetime imaging module (FLIM).
- 3 Widefield microscopy systems with fluorescence that allow live cell imaging experiments and also fixed samples. And another Widefield microscope with a color camera for immunohistochemical samples.
- In addition, it has 2 workstations for image analysis, a vibratome and a stereomicroscope.
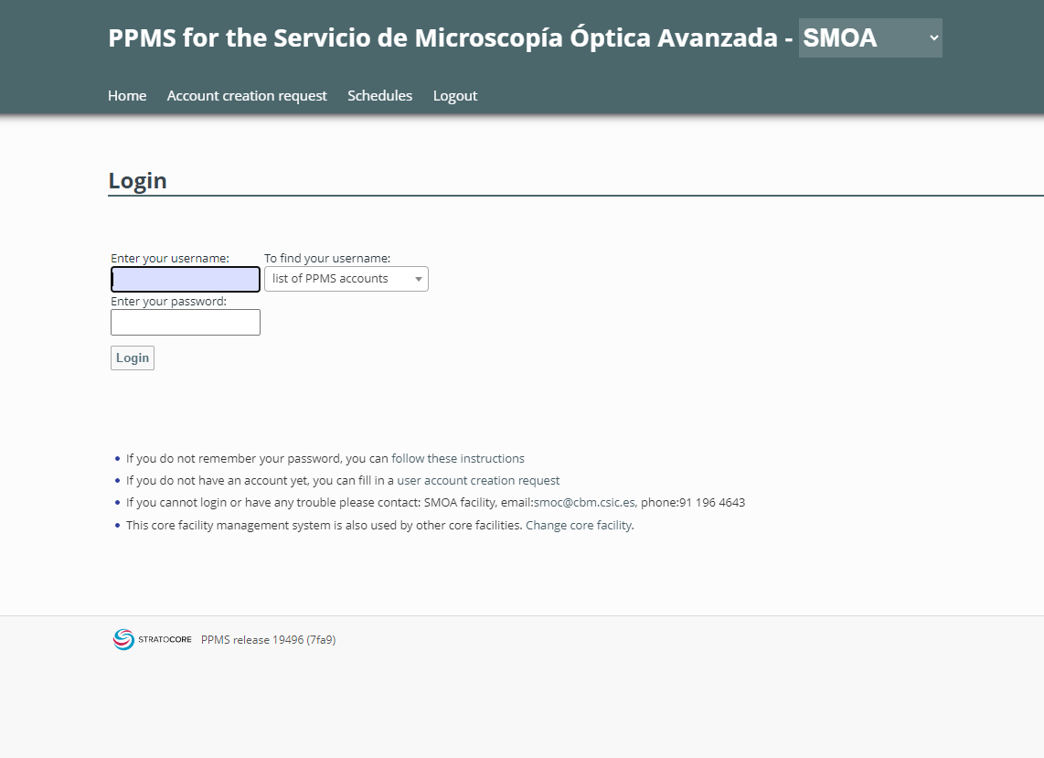
- An on-line system for accessing and managing system bookings and invoicing.
- A stock of reagents and consumables related to microscopy.
Finally, since March 2009, our service has been quality certified according to the ISO9001:2015 standard issued by the company AENOR, which demonstrates SMOA's commitment to rigour and quality.
| Apellidos | Nombre | Laboratorio | Ext.* | Horario | Categoría profesional | |
|---|---|---|---|---|---|---|
| Calvo Cazalilla | Elena | 310 | 4643 | 9:30 - 17:00 | elena.calvo@cbm.csic.es | Técnico Sup. de Actividades Técnicas y Profesionales. GP3 |
| Gallego García | Carlos | 310 | 4643 | 8:00 - 15:30 | cgallego(at)cbm.csic.es | Titulado Sup. de Actividades Técnicas y Profesionales. M3 |
| Sahún Español | Álvaro | 310 | 4643 | 8:30 - 16:00 | alvaro.sahun(at)cbm.csic.es | Titulado Superior FC1 |
| Sánchez Jiménez | Carmen | 310 | 4643 | 9:30-17:00 | csjimenez(at)cbm.csic.es | Titulado Sup. de Actividades Técnicas y Profesionales. M3 |
| Villalba Villacorta | María Teresa | 310 | 4643 | 7:30 - 15:00 | tvillalba(at)cbm.csic.es | Ayudante Investigación |
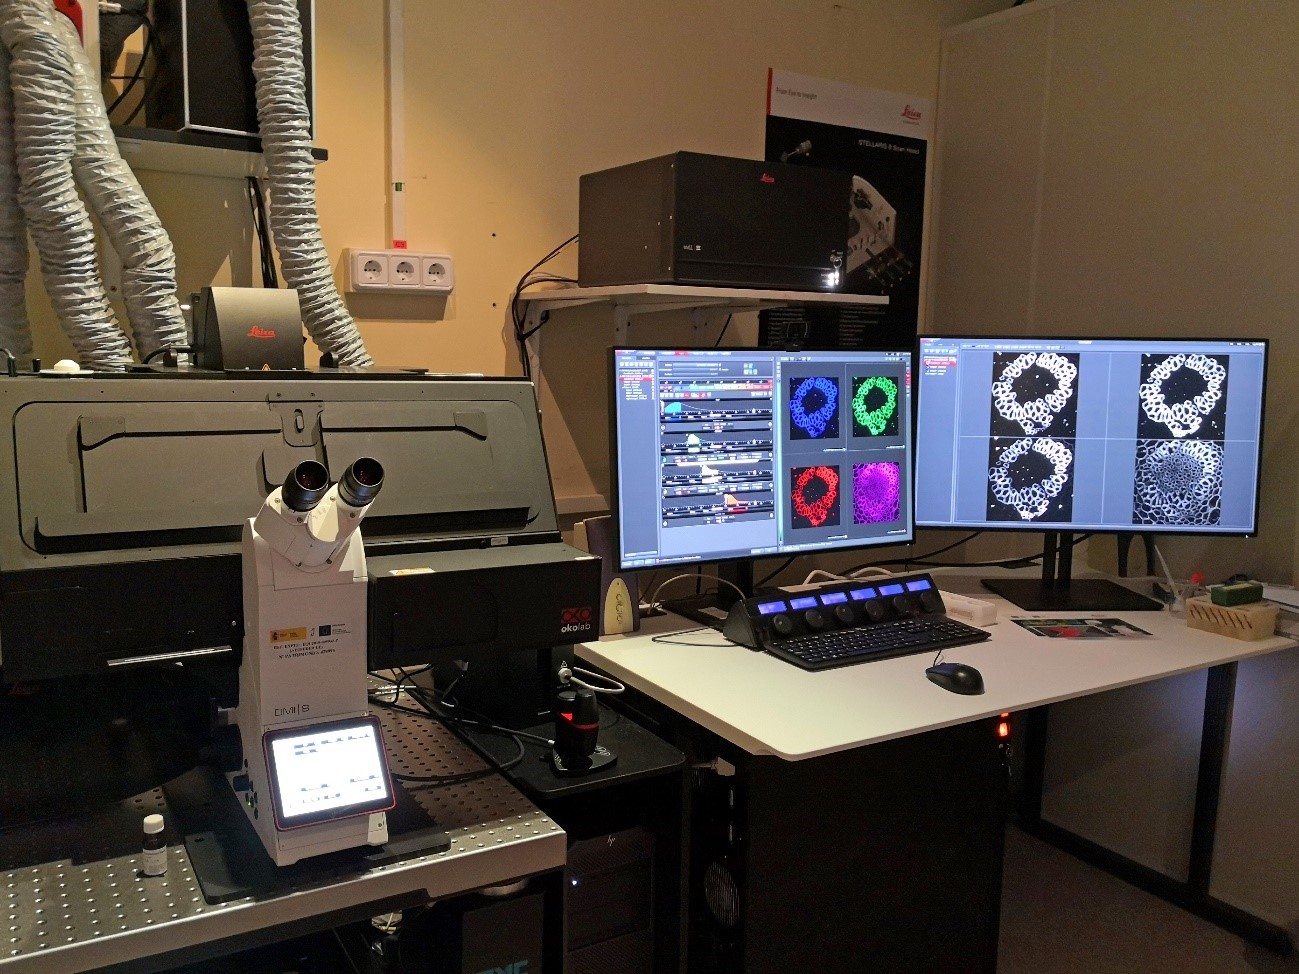
STELLARIS 8 STED + FLIM
Location: 3rd Floor (Lab. 310)
Confocal STELLARIS 8 with STED and FALCON (FLIM) coupled to an inverted DMi8 microscope (Leica)
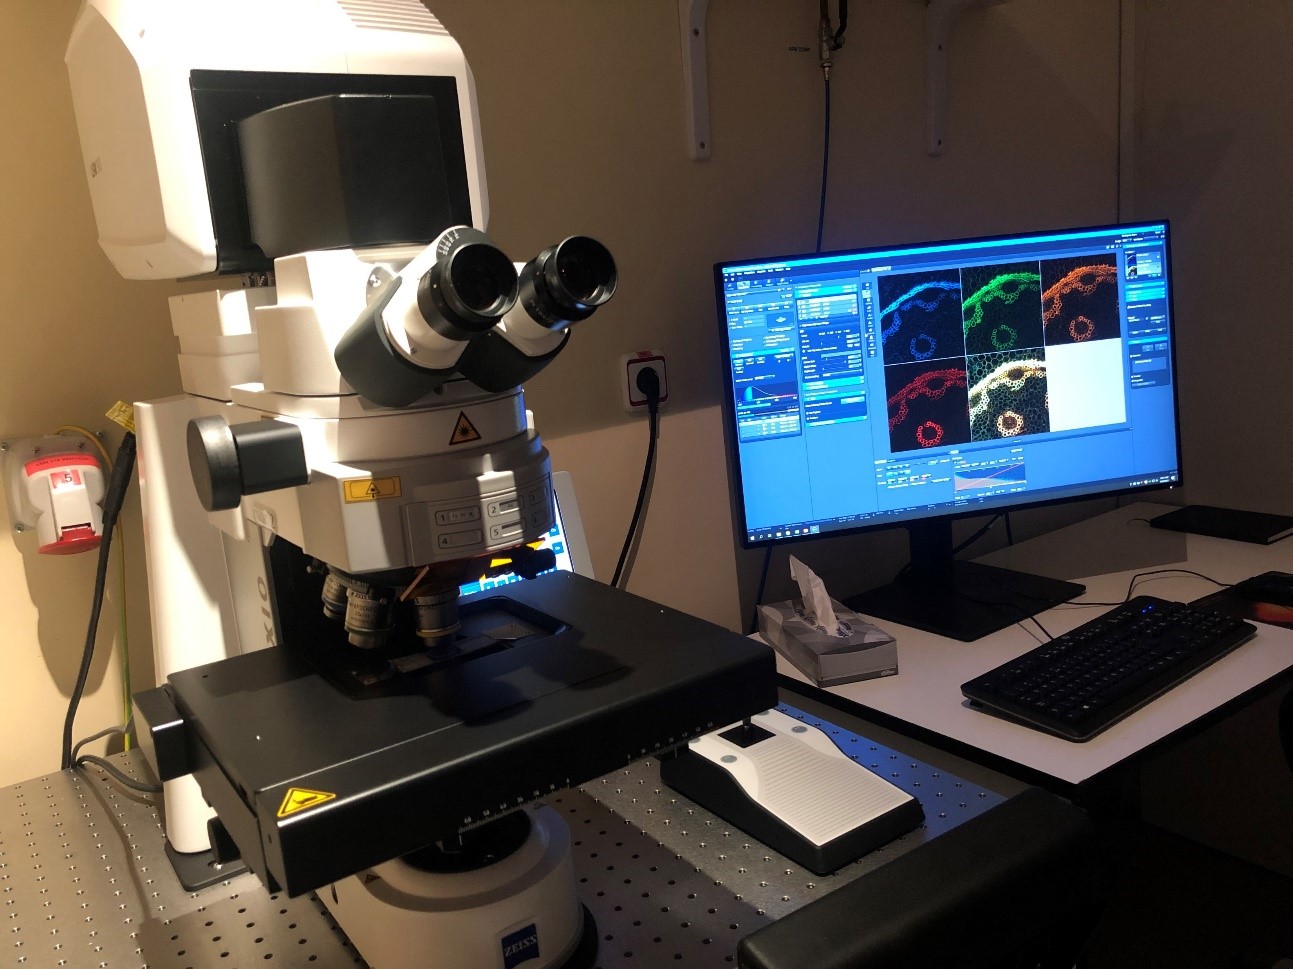
LSM900 Upright Confocal Microscope
Location: 3rd Floor (Lab. 310)
Laser Scanning Confocal Microscope LSM900 coupled to an upright Axio Imager 2 Microscope (Zeiss)
USER GUIDE (Available under "Documents" at the PPMS Booking Systems)

Spinning Disk SpinSR10 Confocal Microscope
Location: 3rd Floor (Lab. 310)
Spinning Disk Confocal SpinSR10 coupled to an inverted IX83 microscope (Olympus)
USER GUIDE (Available under "Documents" at the PPMS Booking System)
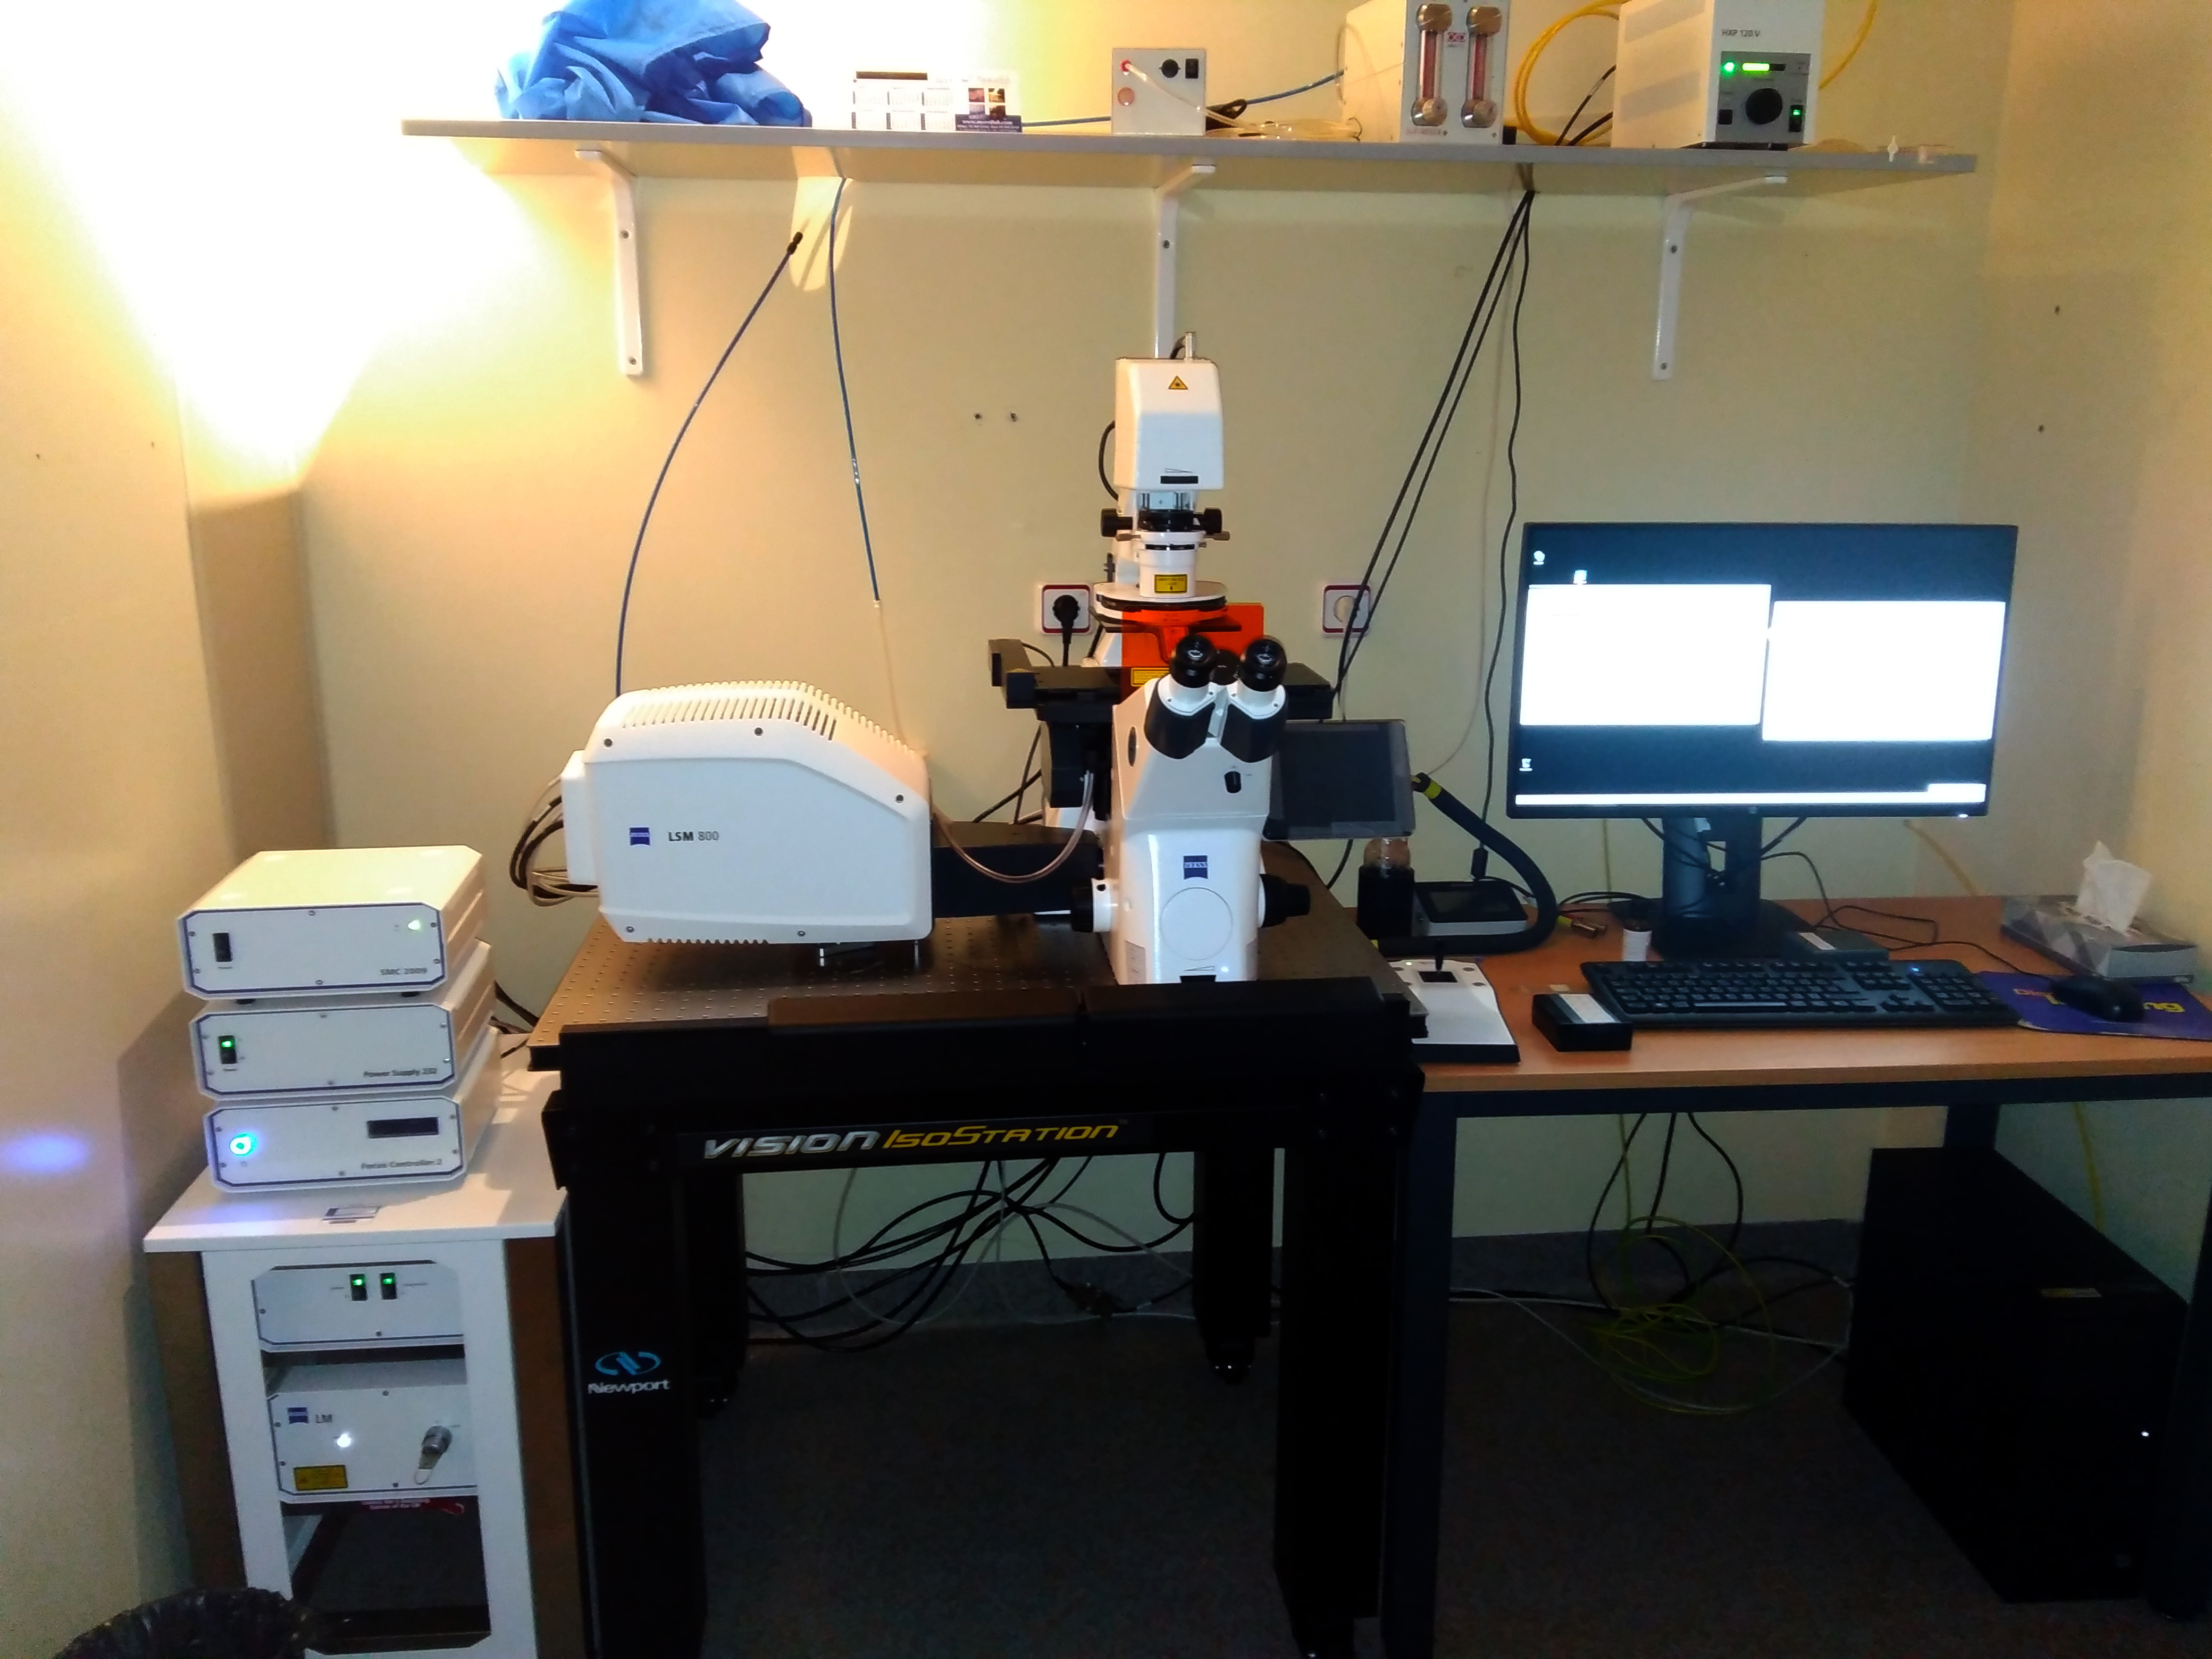
LSM800 Inverted Confocal Microscope
Location: 3rd Floor (Lab. 310)
Laser Scanning Confocal Microscope LSM800 coupled to an inverted Axio Observer Microscope (Zeiss)
USER GUIDE (Available under "Documents" at the PPMS Booking System)
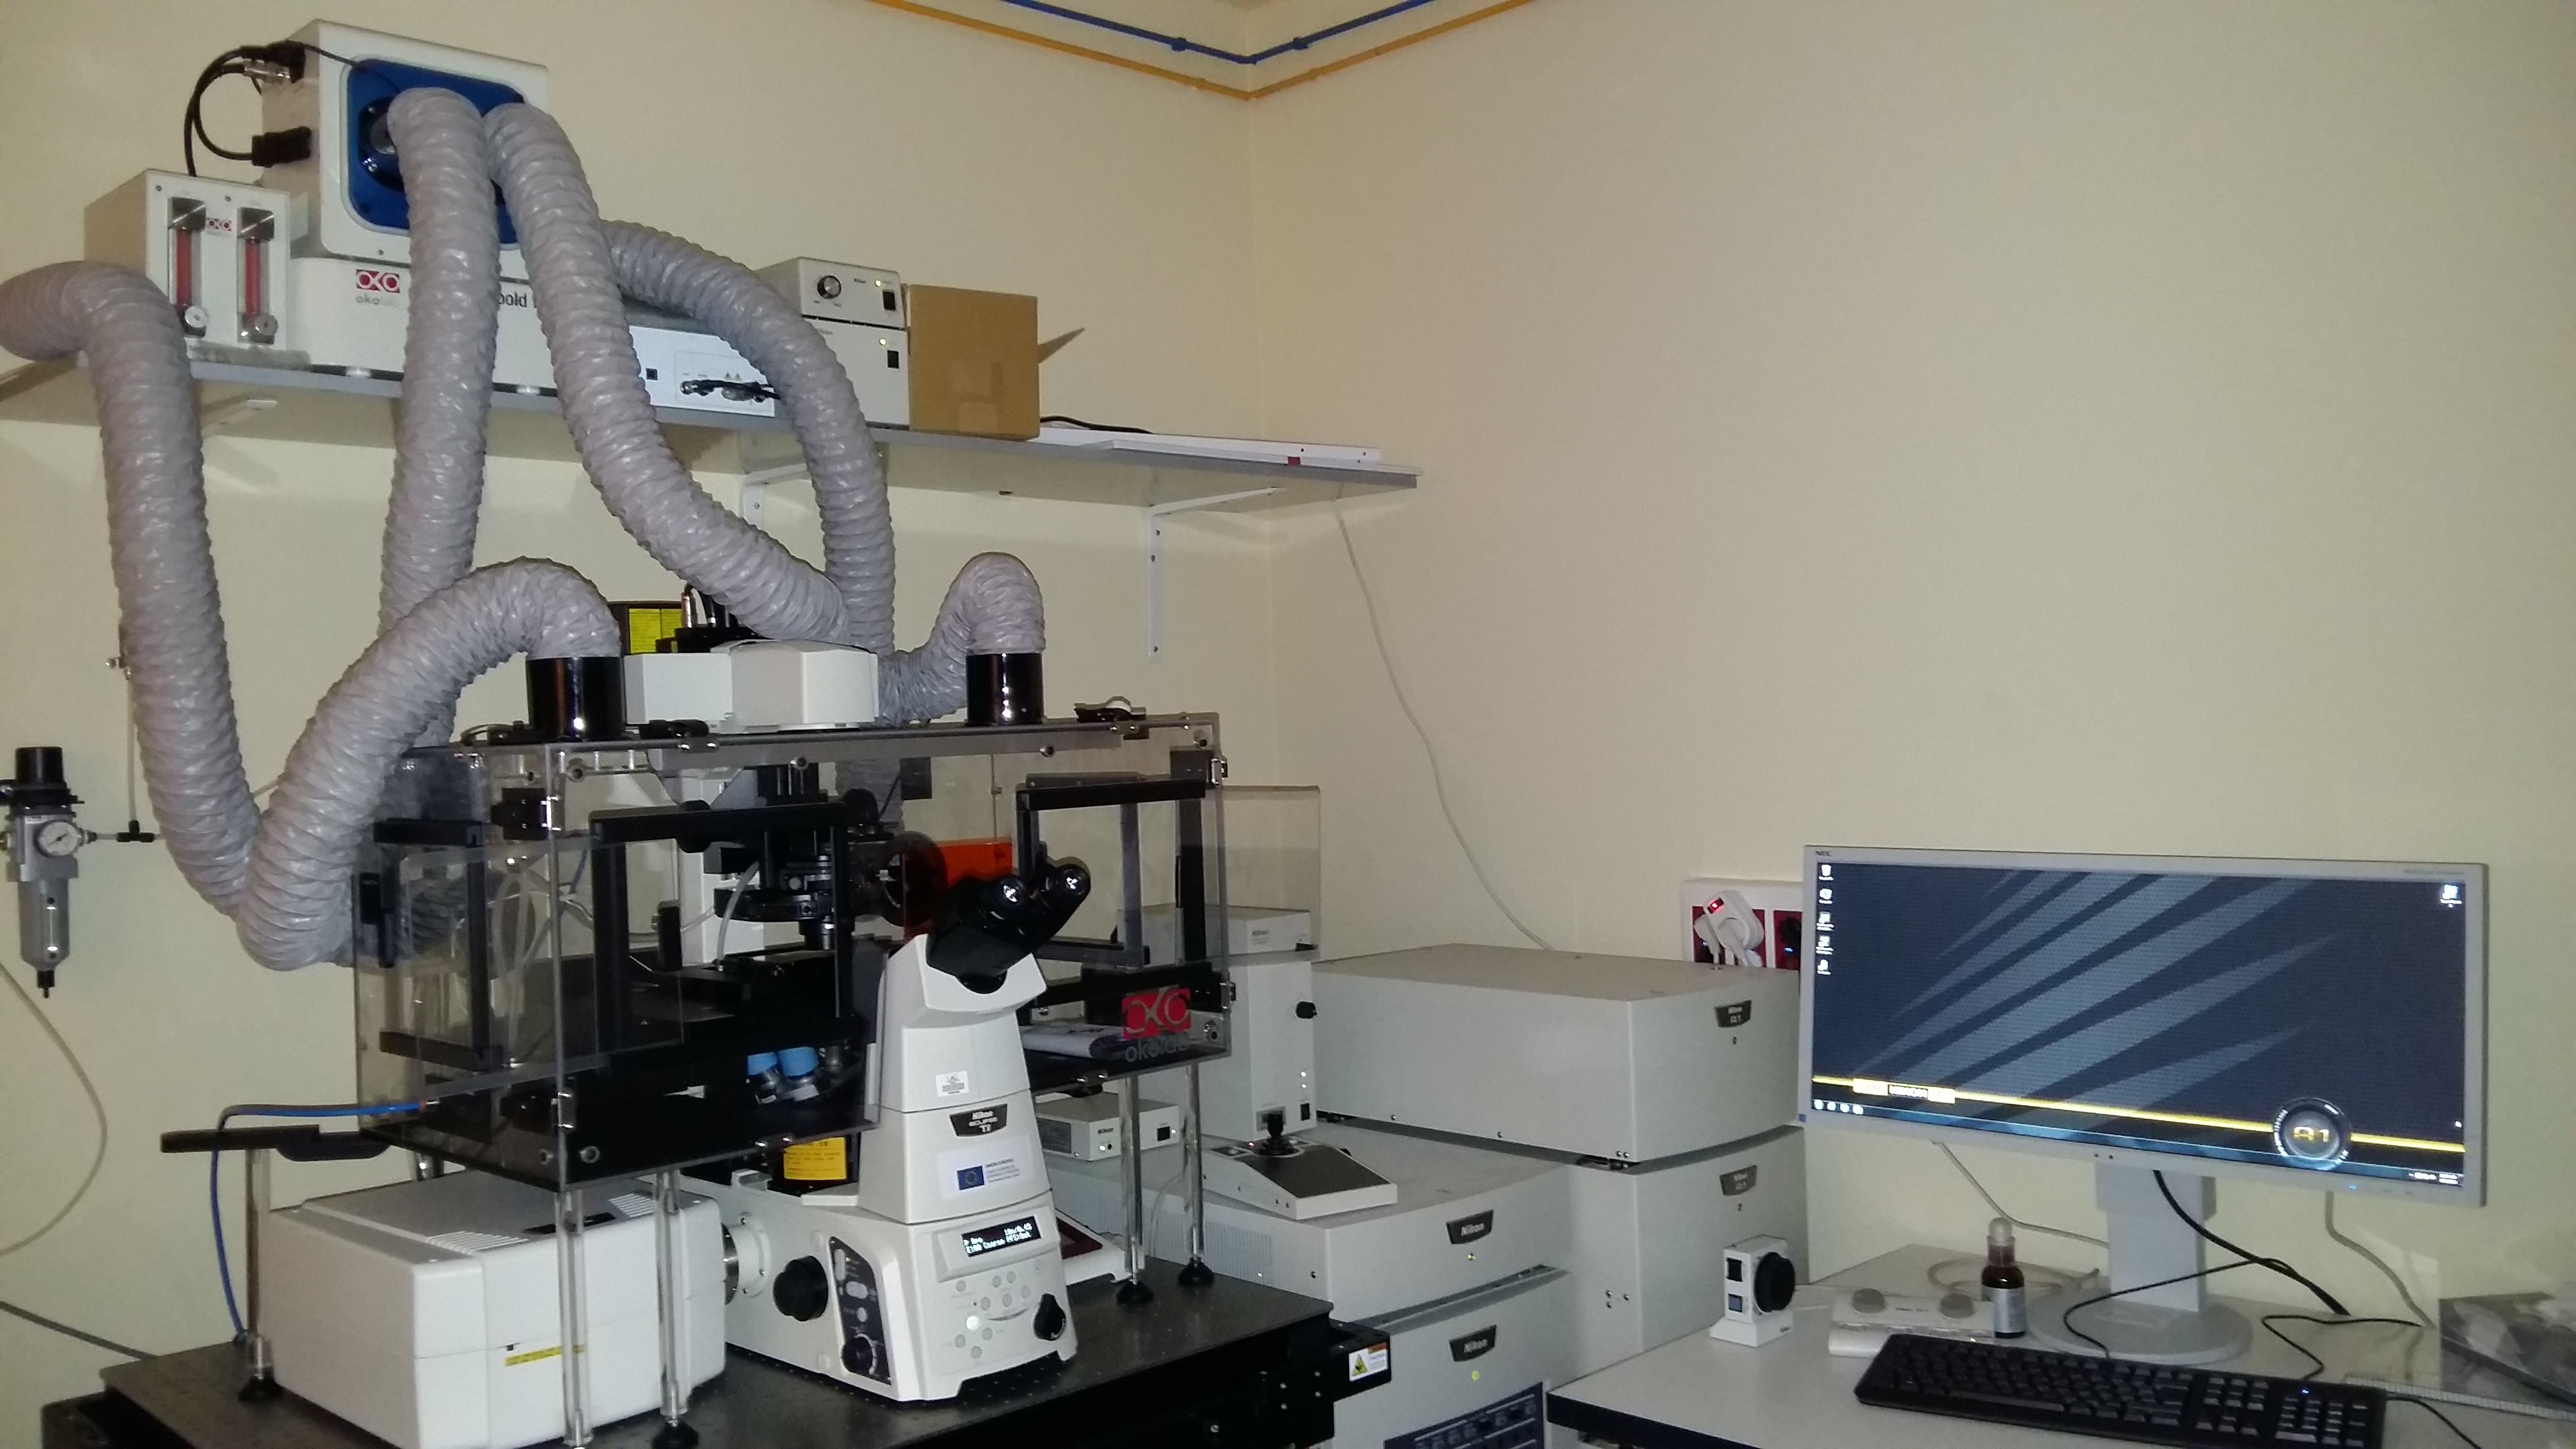
In vivo Nikon A1R+ Confocal Microscope
Location: 3rd Floor (Lab. 310)
Laser Scanning Confocal Microscope A1R + coupled to an inverted Eclipse Ti-E microscope (Nikon)
USER GUIDE (Available under "Documents" at the PPMS Booking Systems)

LSM710 Upright Confocal Microscope
Location: 3rd Floor (Lab. 310)
Laser Scanning Confocal Microscope LSM710 coupled to a upright AxioImager.M2 (Zeiss)
USER GUIDE (Available under "Documents" at the Booking System)
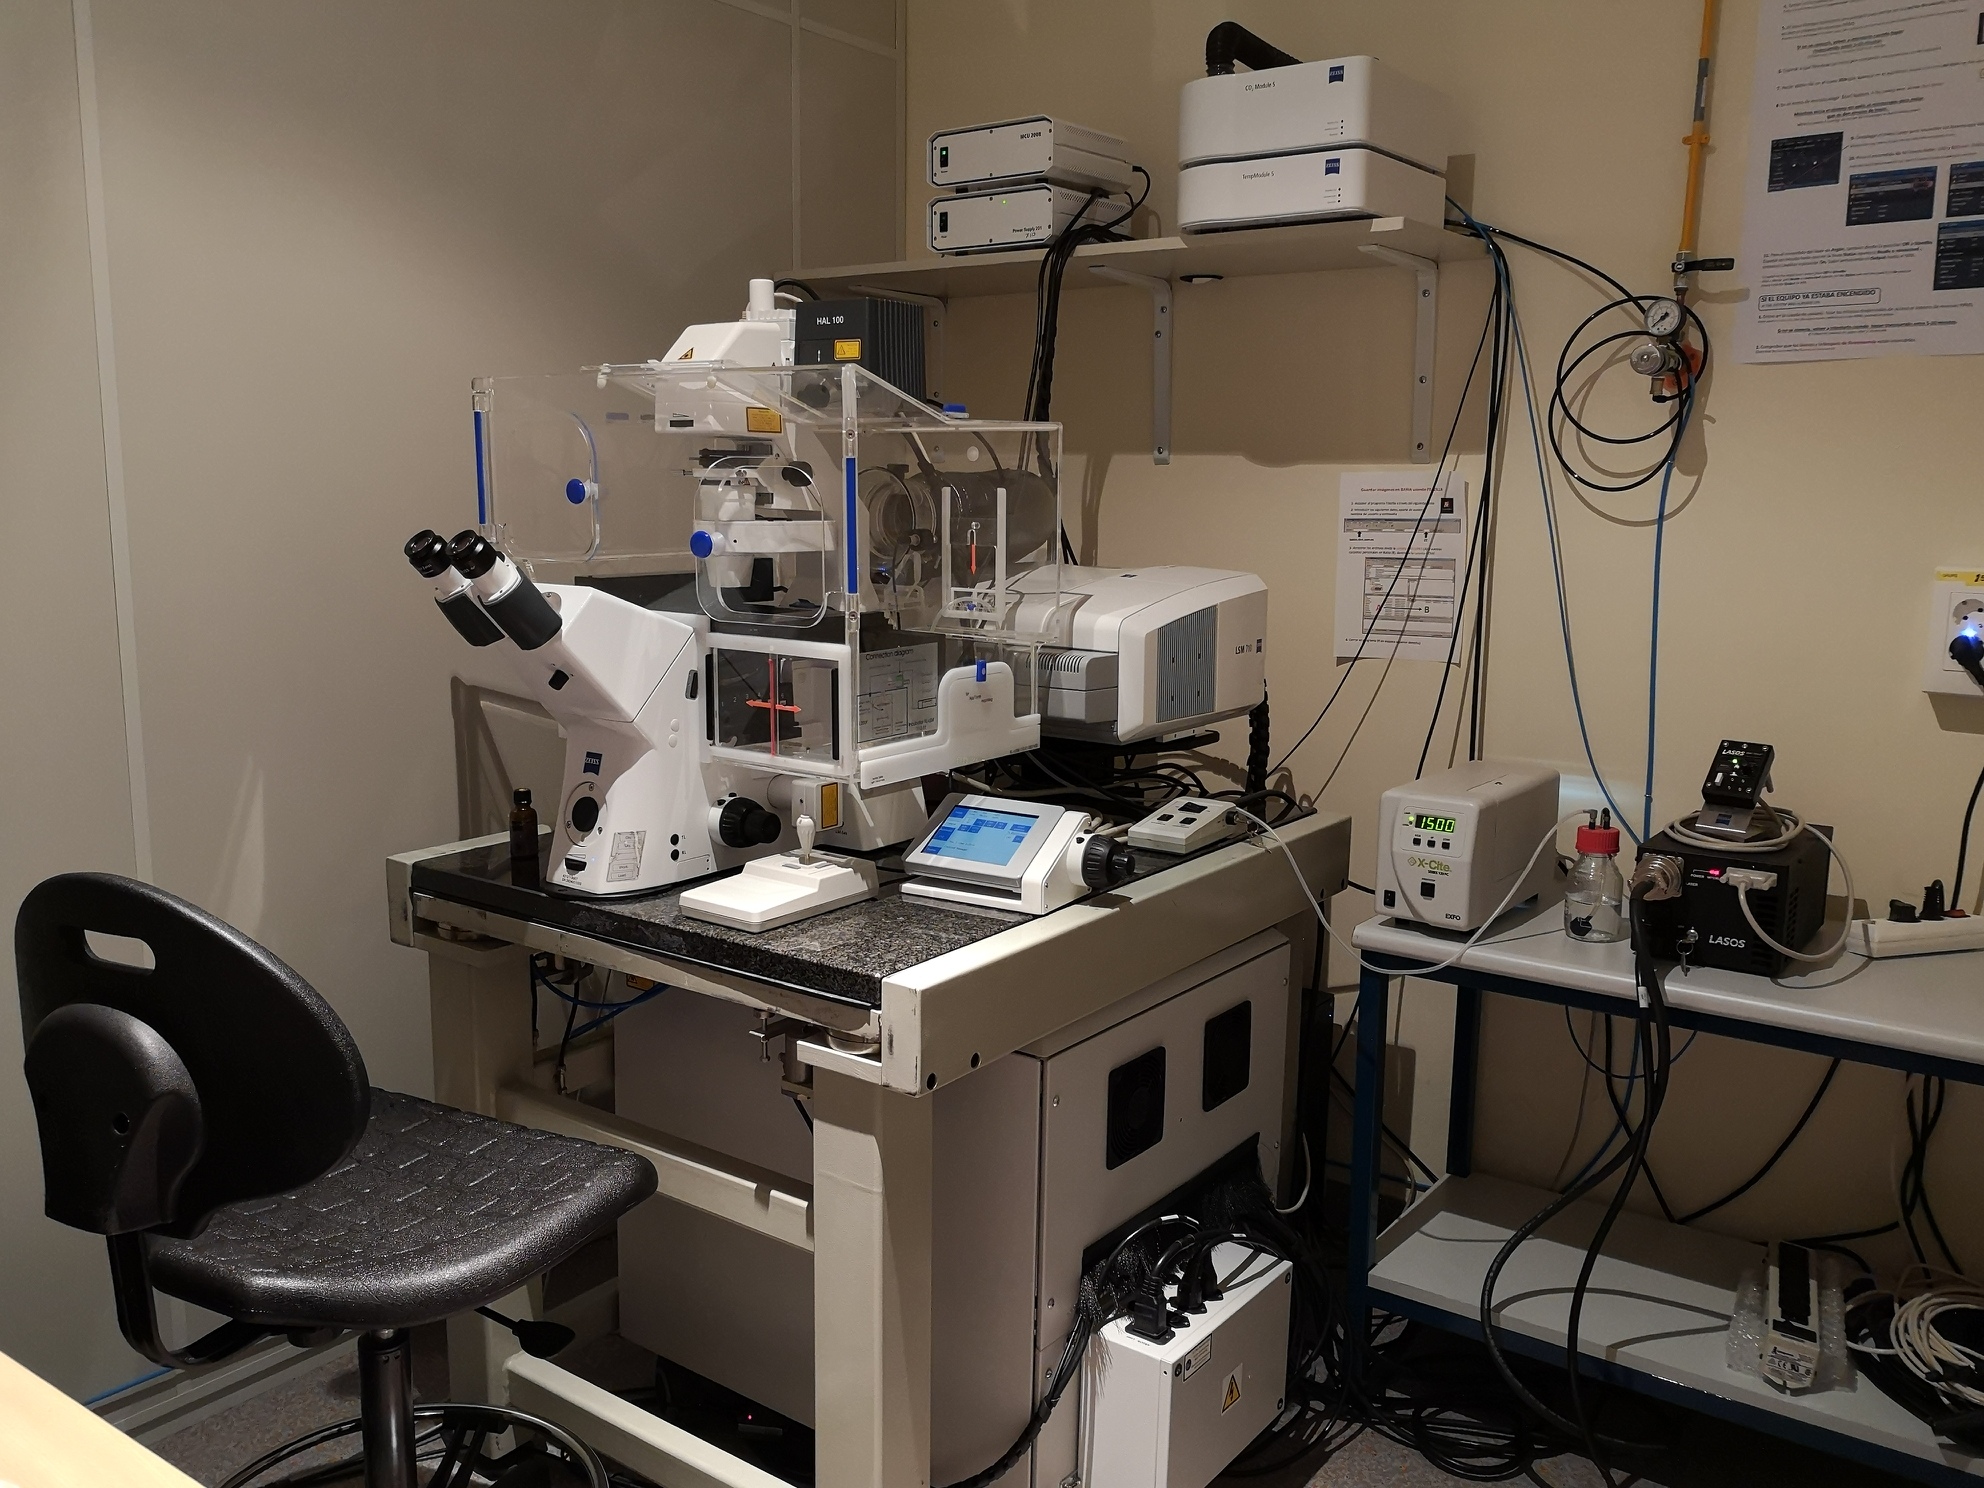
LSM710 Inverted Confocal Microscope
Location: 3rd Floor (Lab. 355)
Laser Scanning Confocal Microscope LSM710 coupled to an inverted AxioObserver microscope (Zeiss)
USER GUIDE (Available under "Documents" at the Booking Systems)
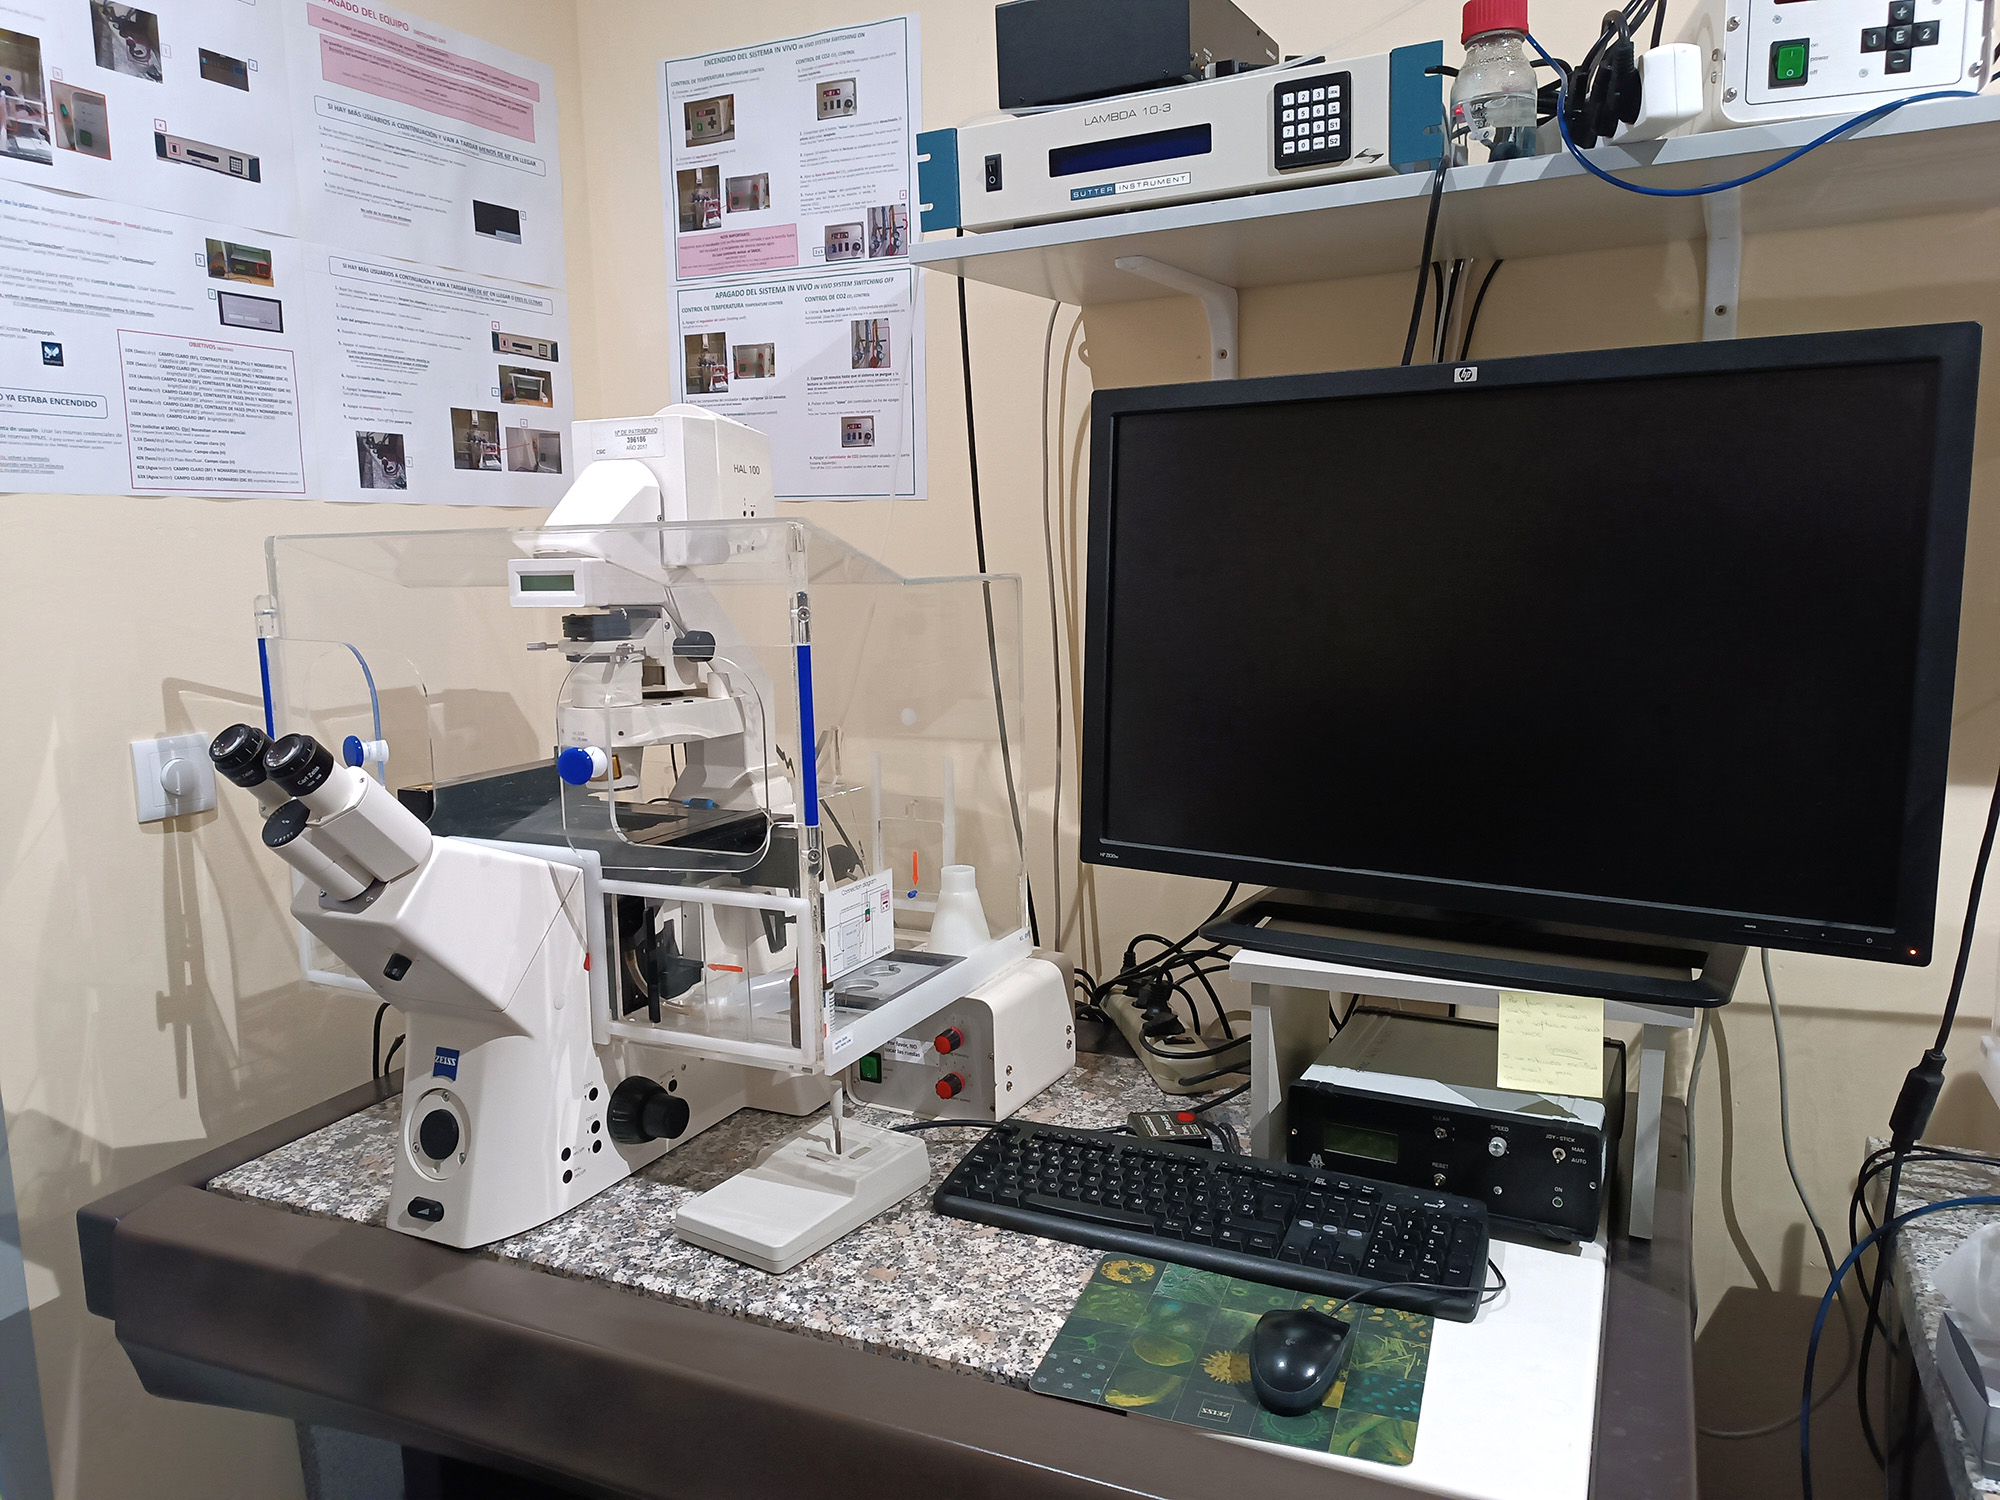
Orca Flash (sCMOS-monochrome)
Location: 3rd Floor (Lab. 310)
In vivo system in the inverted microscope Axiovert200 (Zeiss) coupled to a monochrome sCMOS camera and ultrafast filter switching
USER GUIDE (Available under "Documents" at the PPMS Booking System)
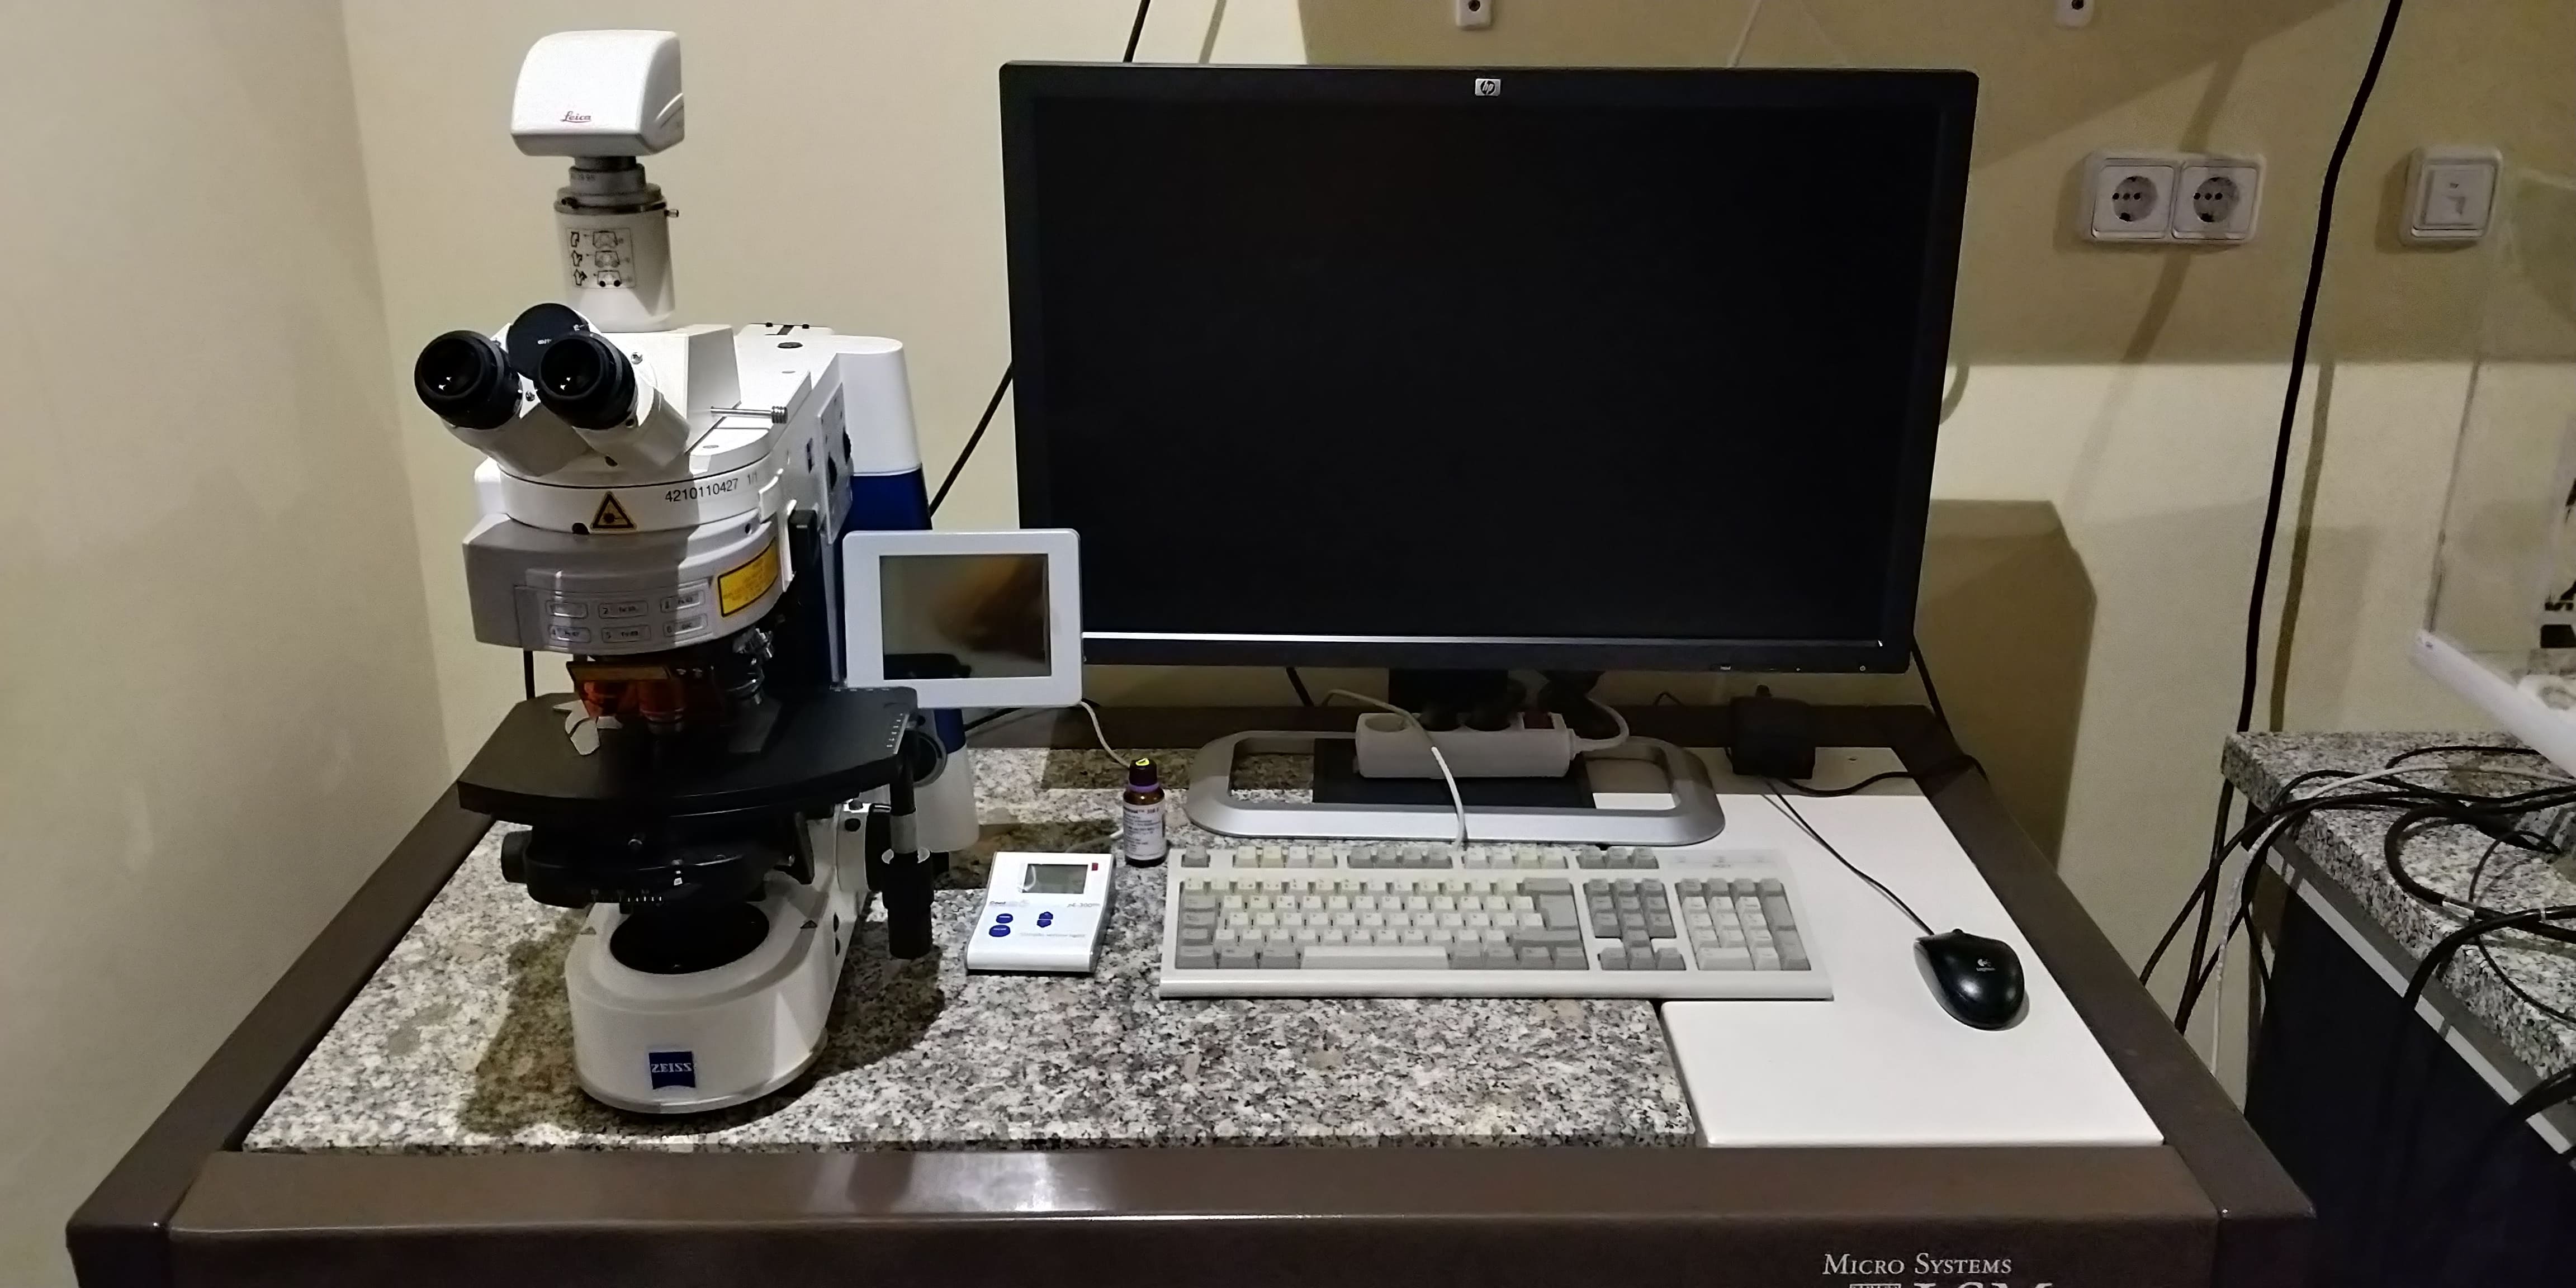
CMOS-color Camera
Location: 3rd Floor (Lab. 335)
Upright Axioskop2 plus microscope (Zeiss) coupled to a color CMOS camera (DMC6200 Leica)
USER GUIDE (Available under "Documents" at the PPMS Booking System)
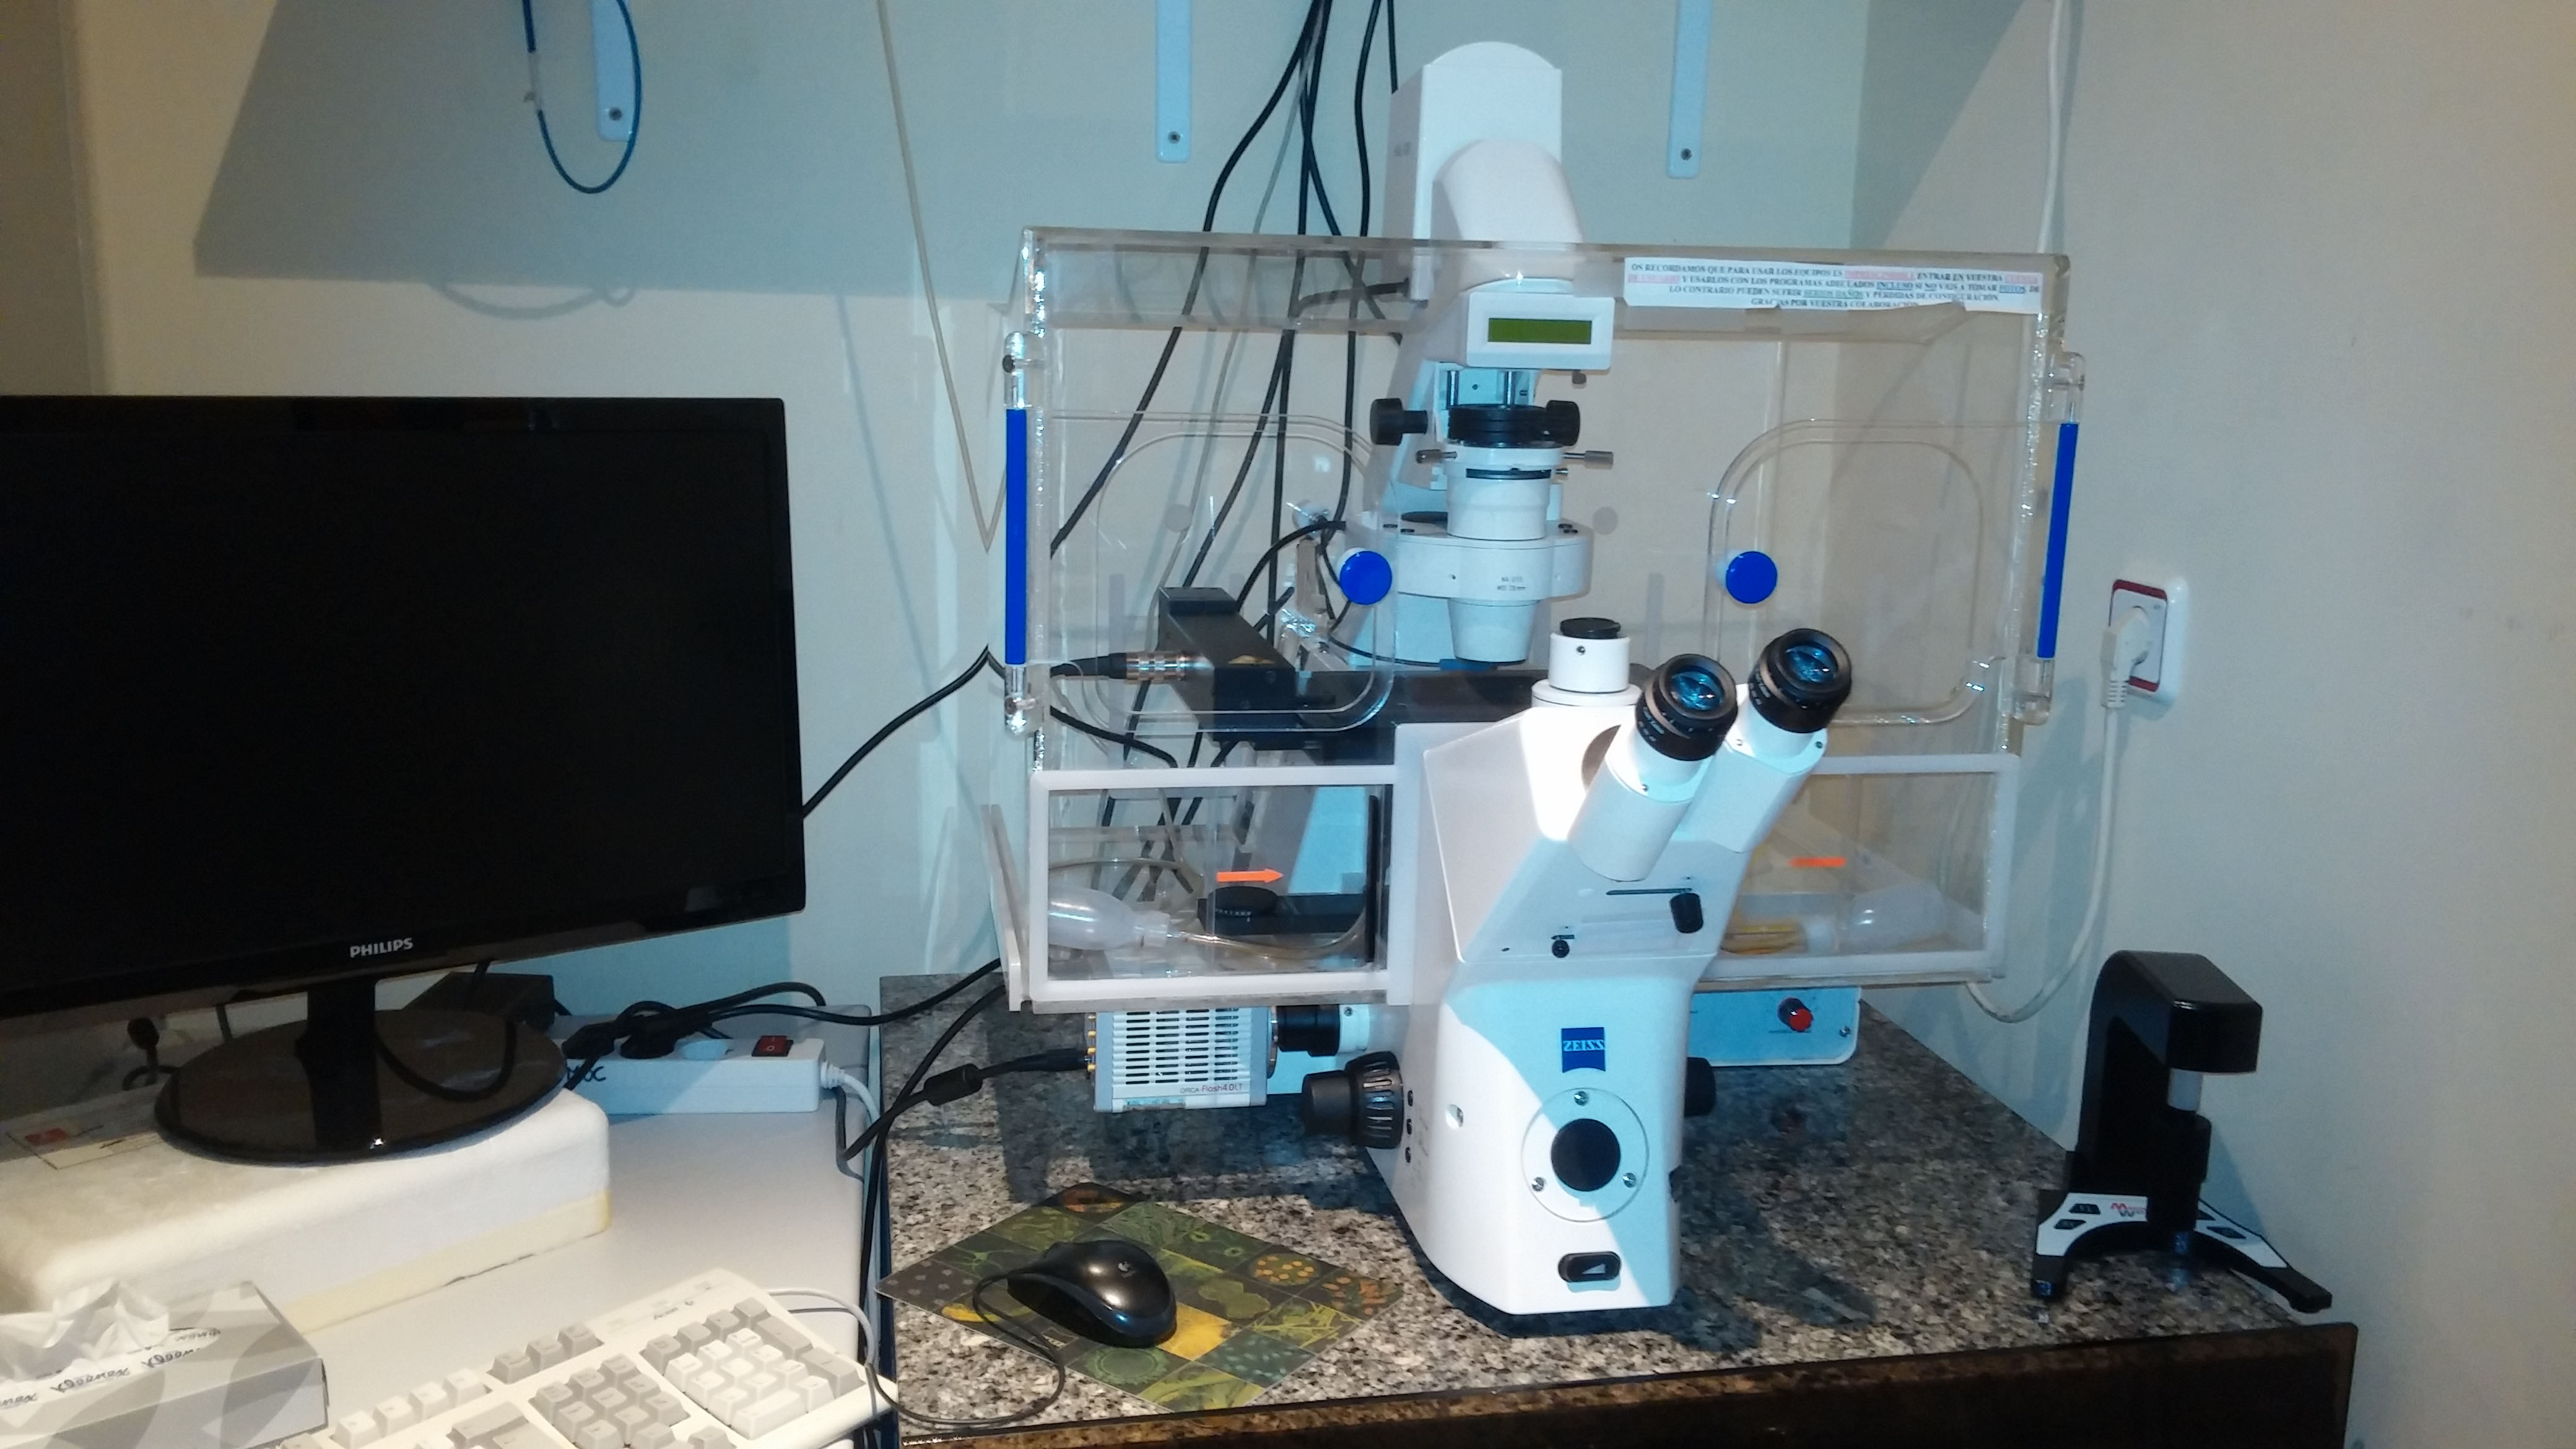
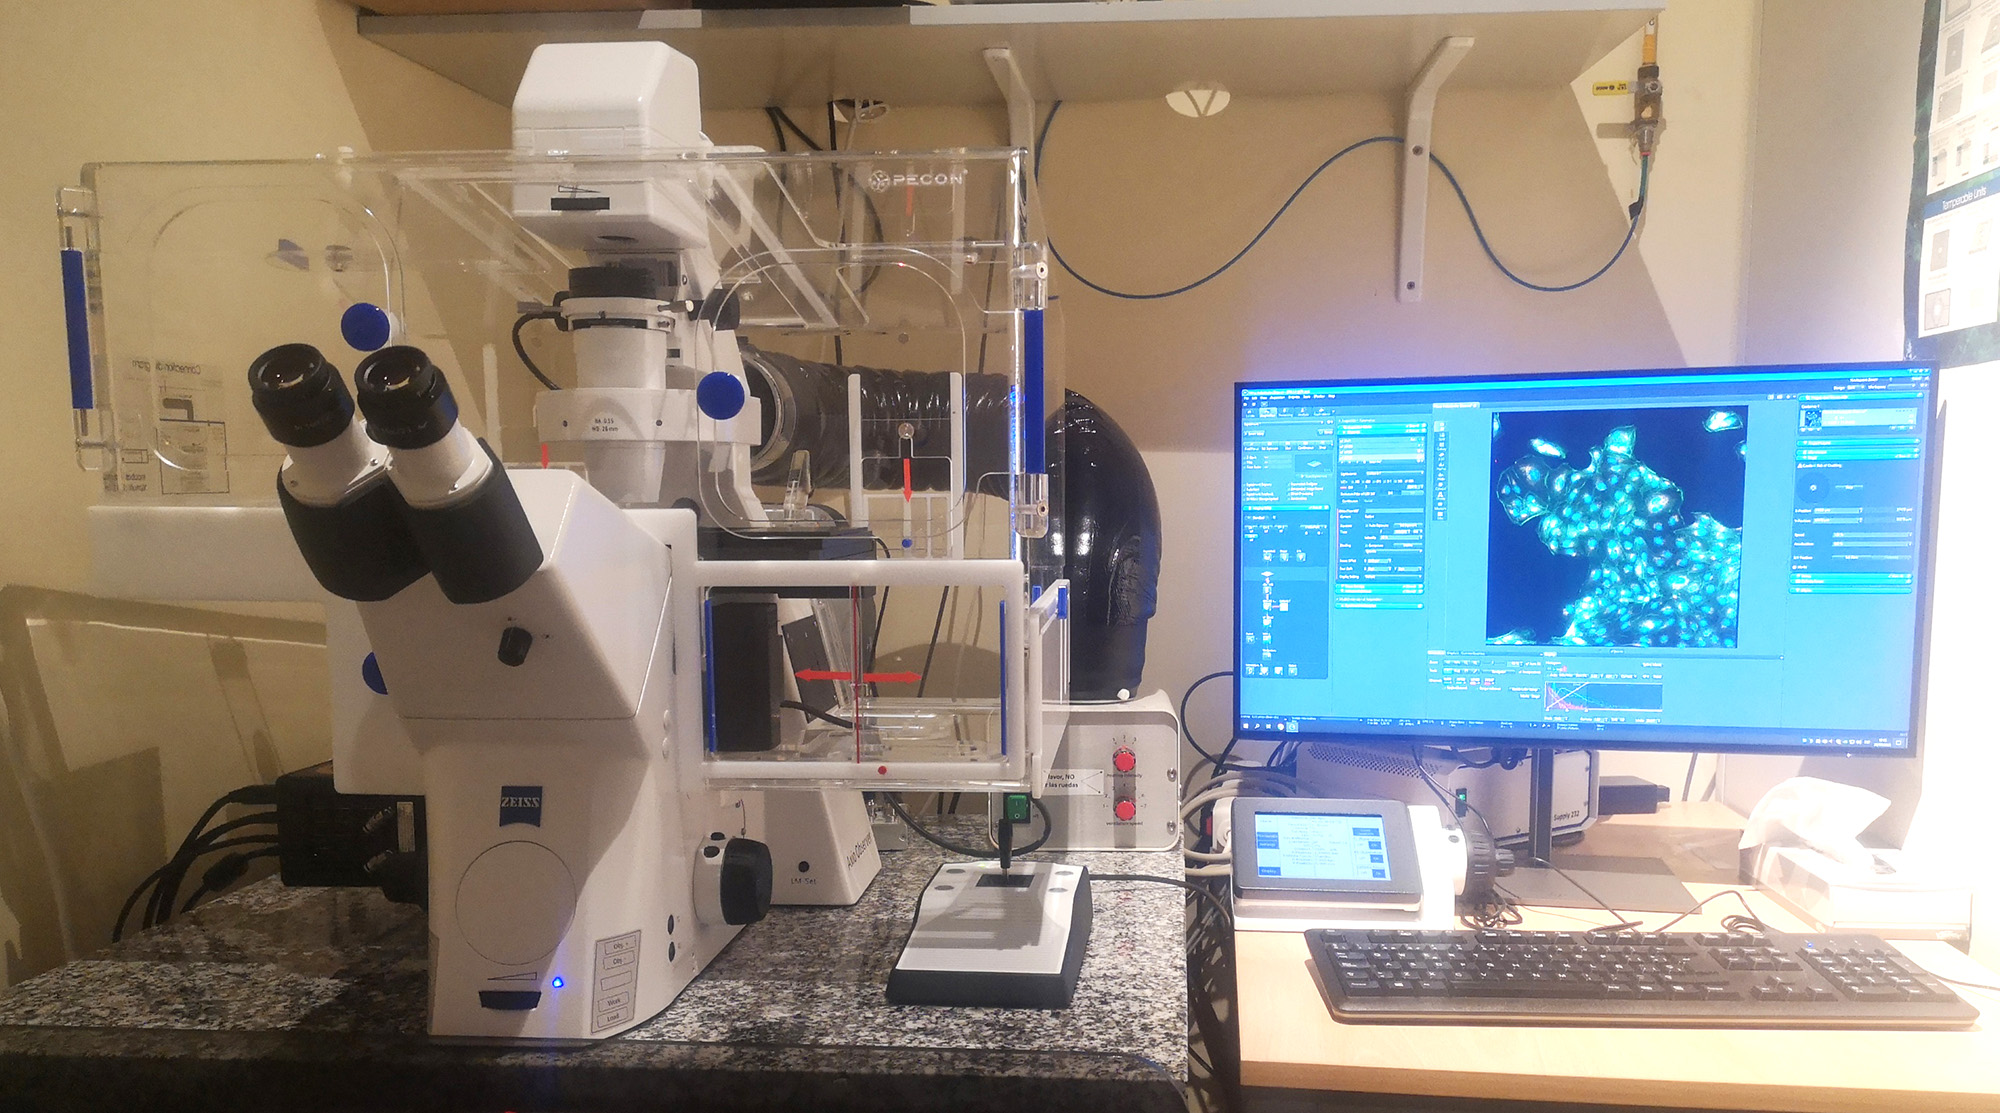
PCO (FRET)
Location: 3rd Floor (Lab. 355)
In vivo system in the inverted microscope Axiovert200 (Zeiss) coupled to a monochrome sCMOS camera and ultrafast filter switching
USER GUIDE (Available through "Documents" at the Booking System)
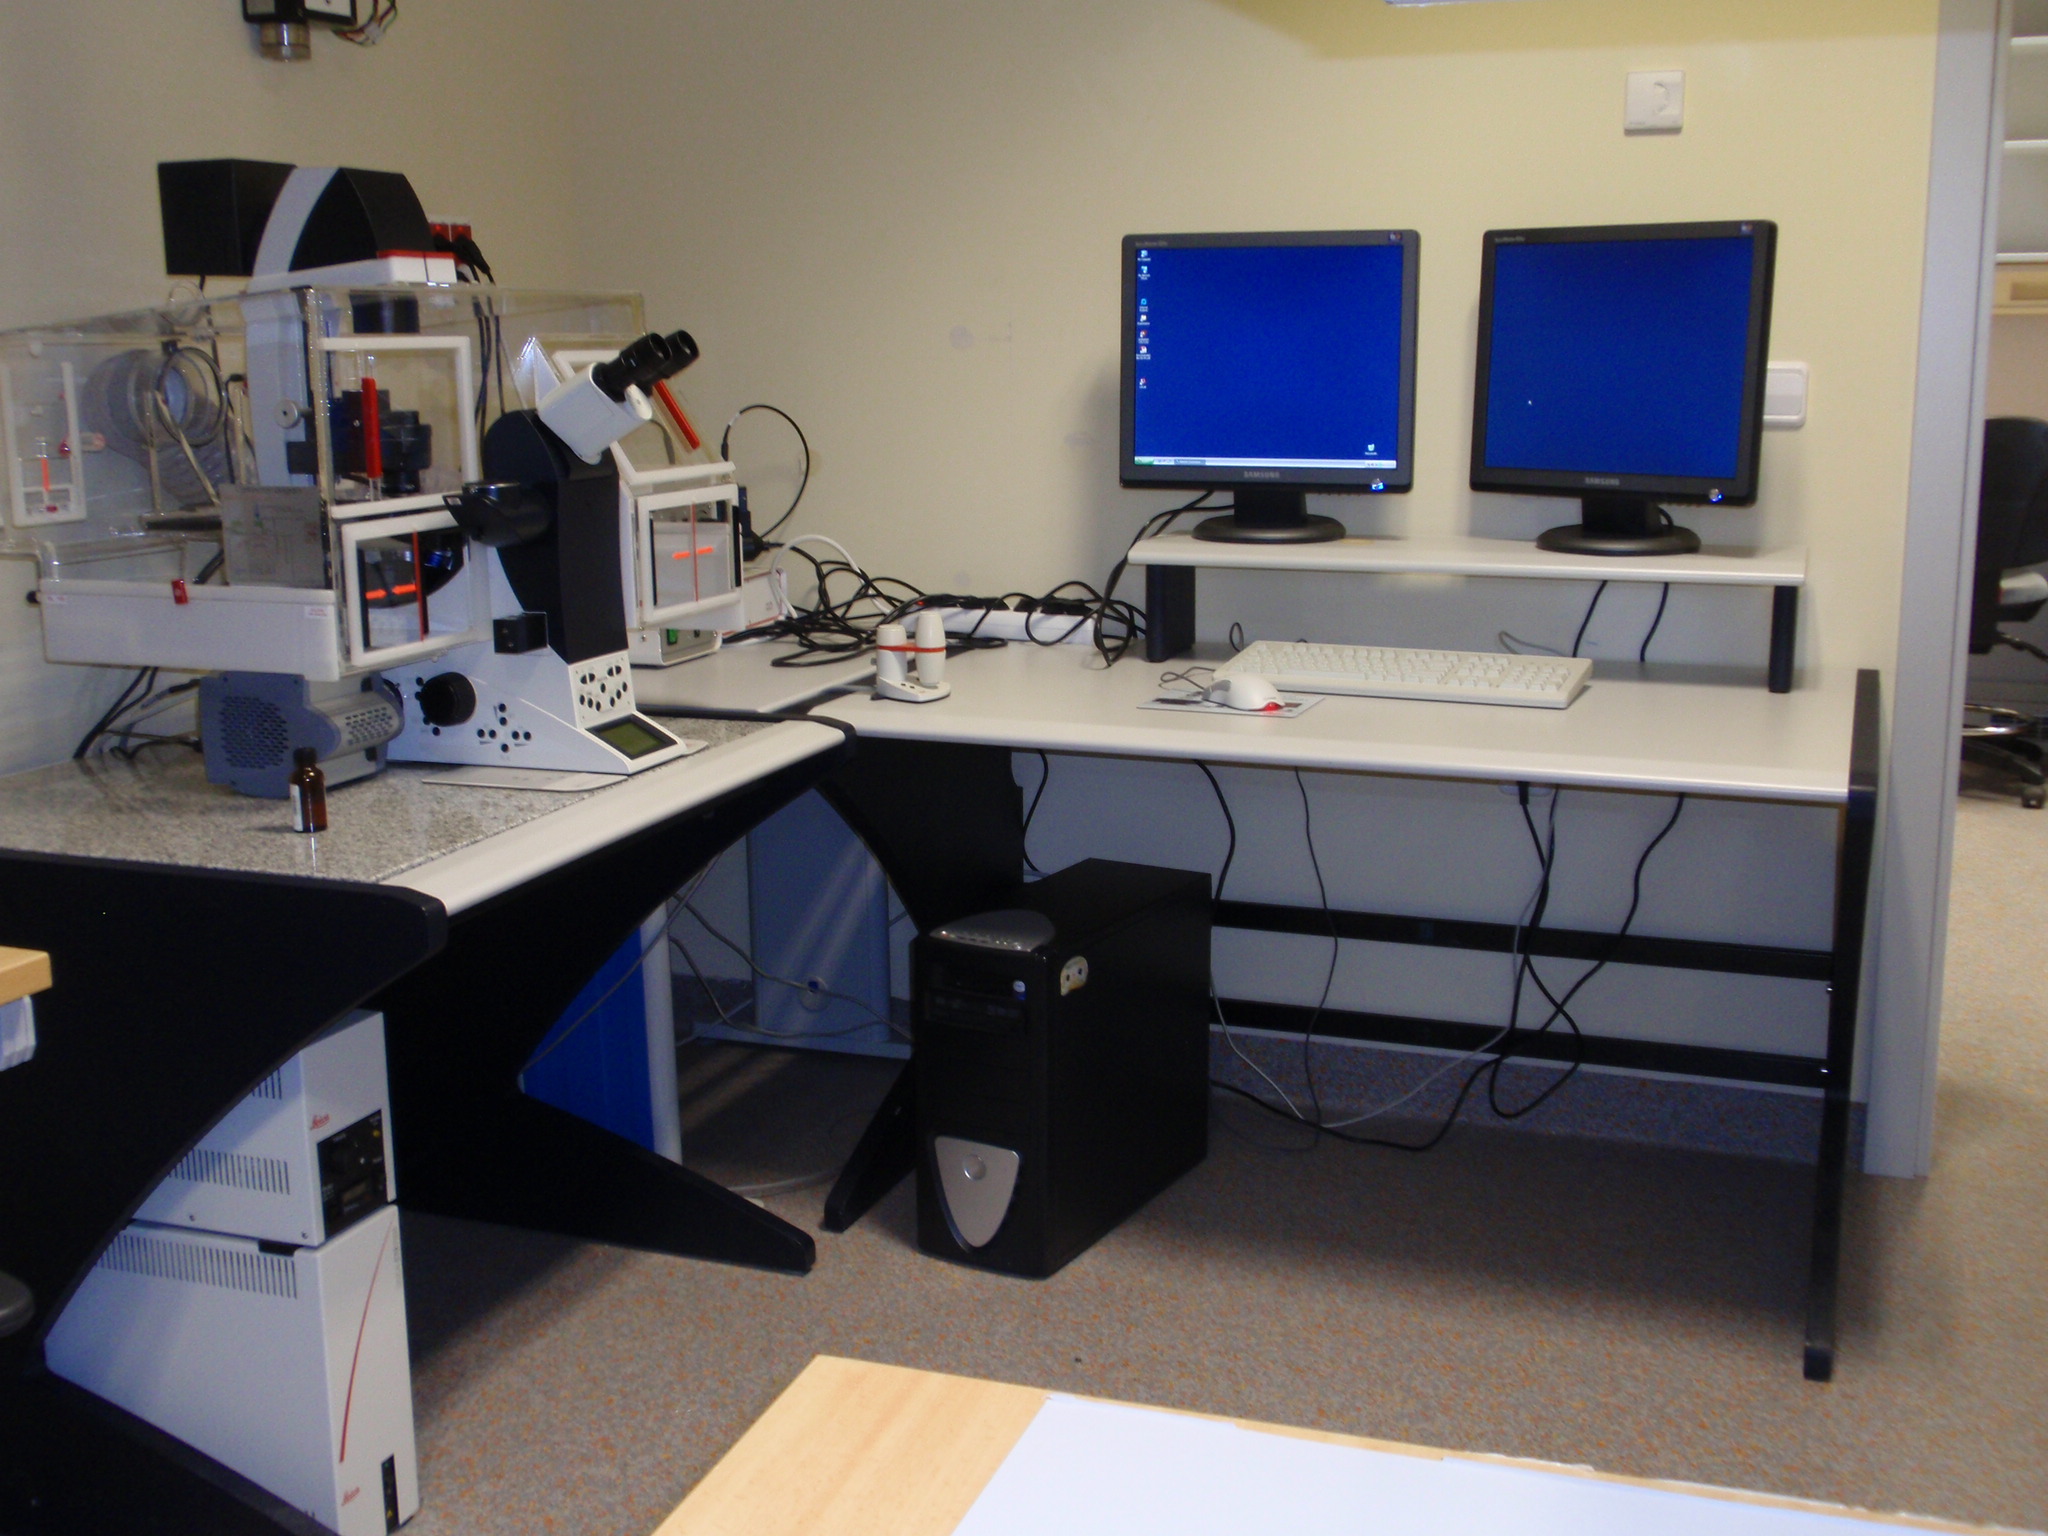
High-speed in vivo system
Location: 4th Floor (Lab. 423.a)
In vivo system in the inverted microscope AF6000 LX (Leica) coupled to a monochrome EMCCD camera and ultrafast filter switching for calcium experiments.
USER GUIDE (Available under "Documents" at the Booking System)
Orca-Fusion
(still in development)
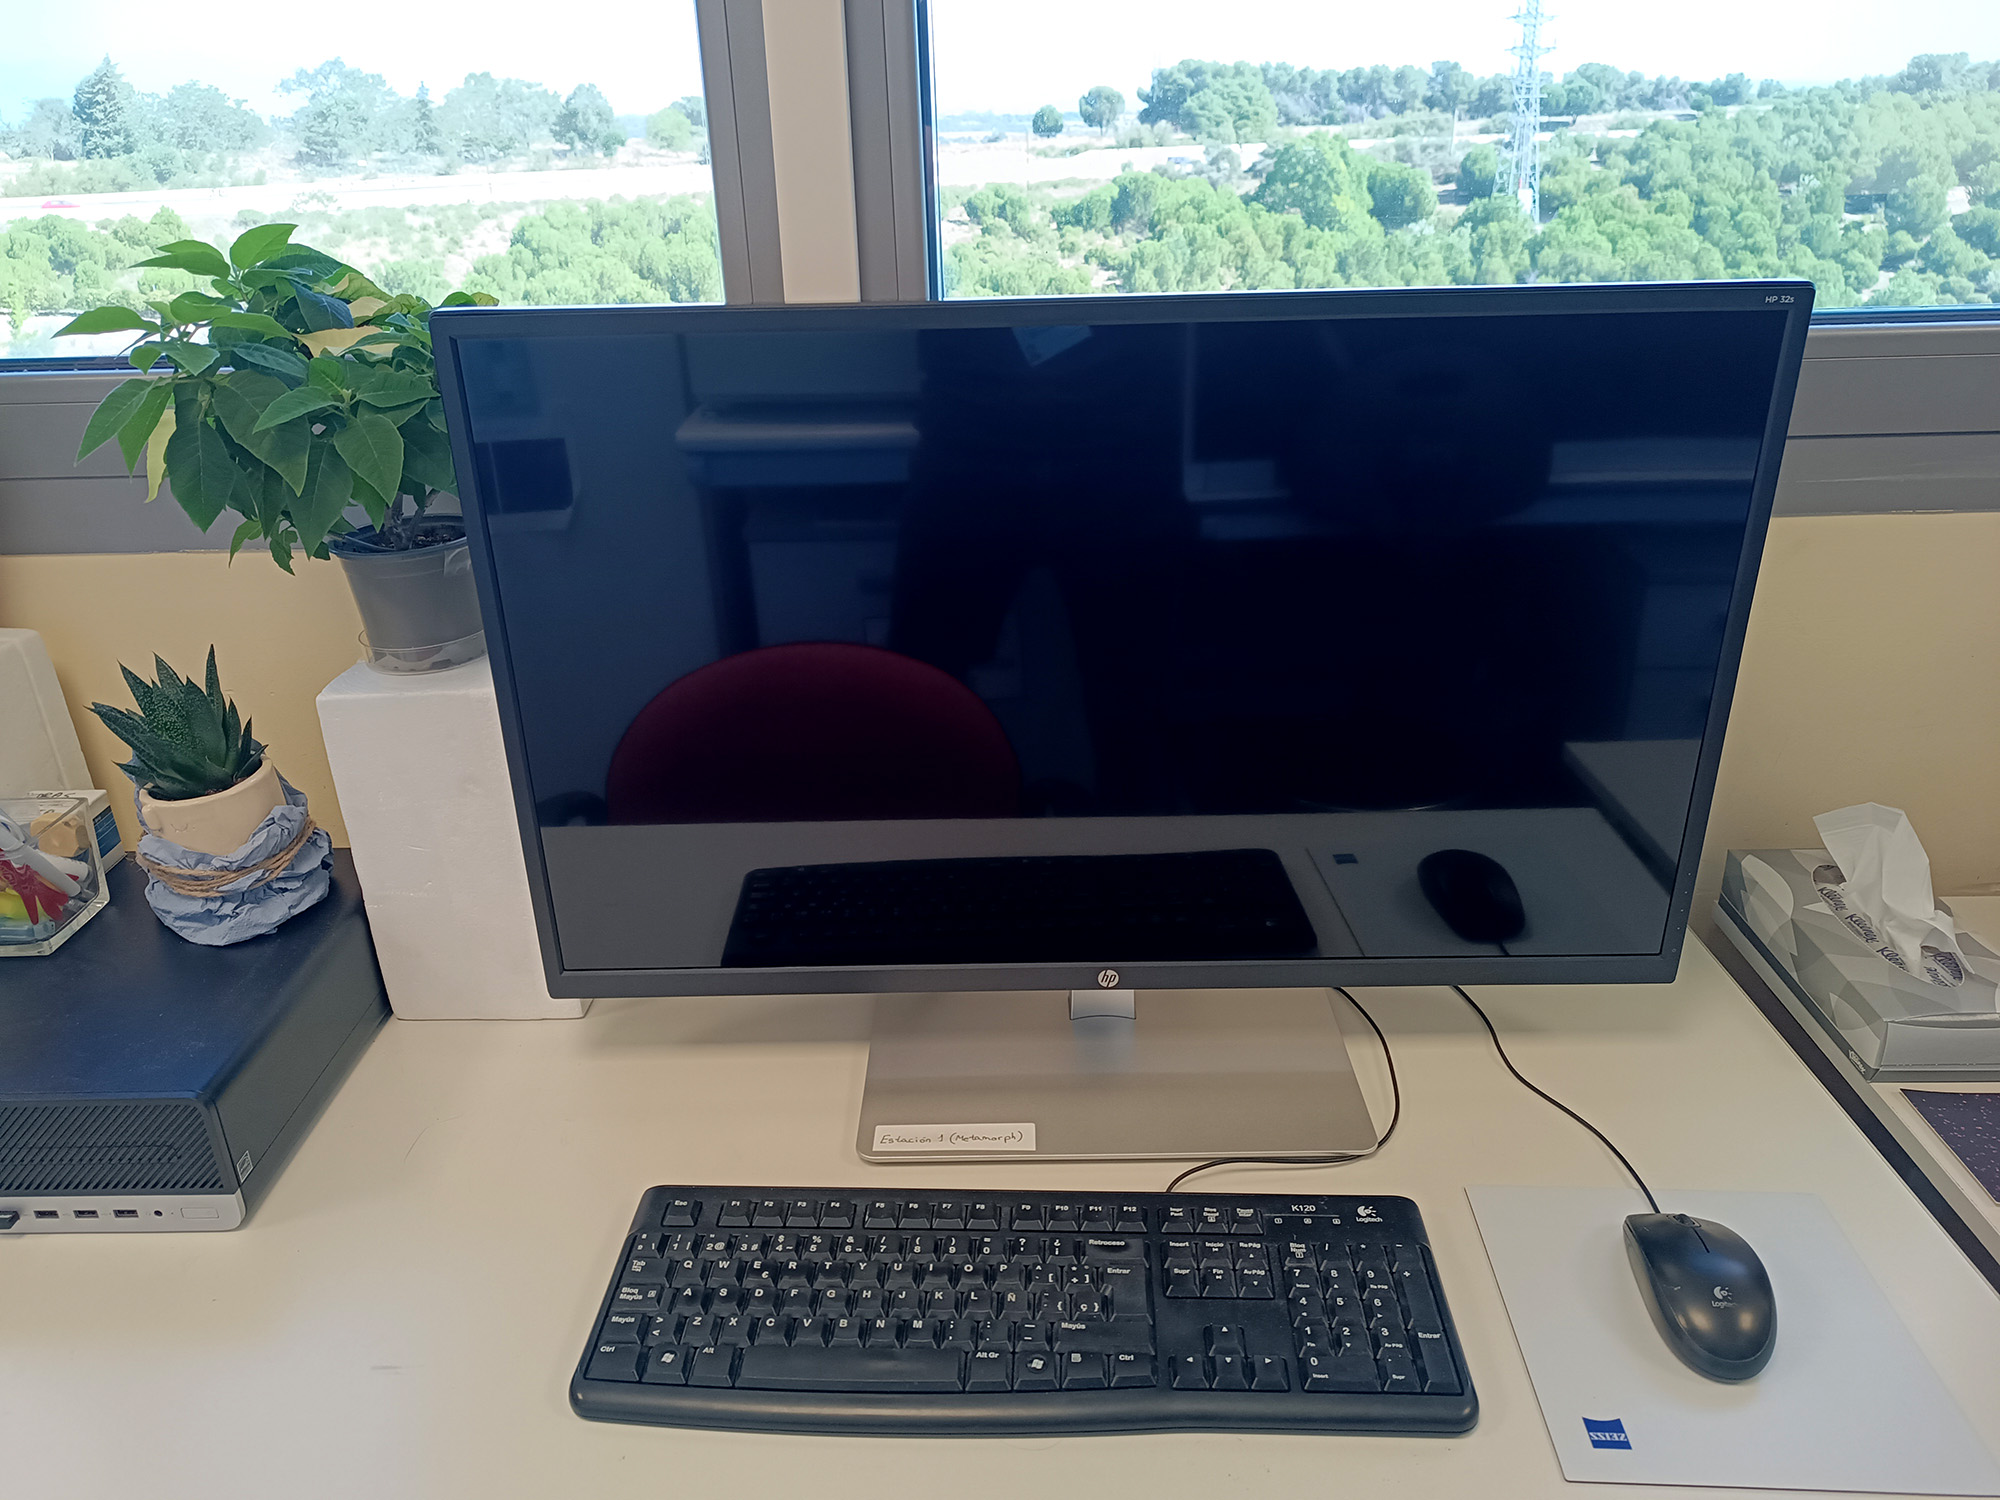
Workstation 1 (Metamorph)
Location: 3rd Floor (Lab. 310)
Hardware:
- Processor: AMD Ryzen 5 2600
- 64 Gb RAM
- Nvidia Geforce GTX 1660 Ti 6Gb
- Phillips 27” Monitor
- DVD Rewriter
Software:
- NIS Viewer 5.12
- Metamorph 7.10.3
- Fiji
- VIAS
- NeuronStudio
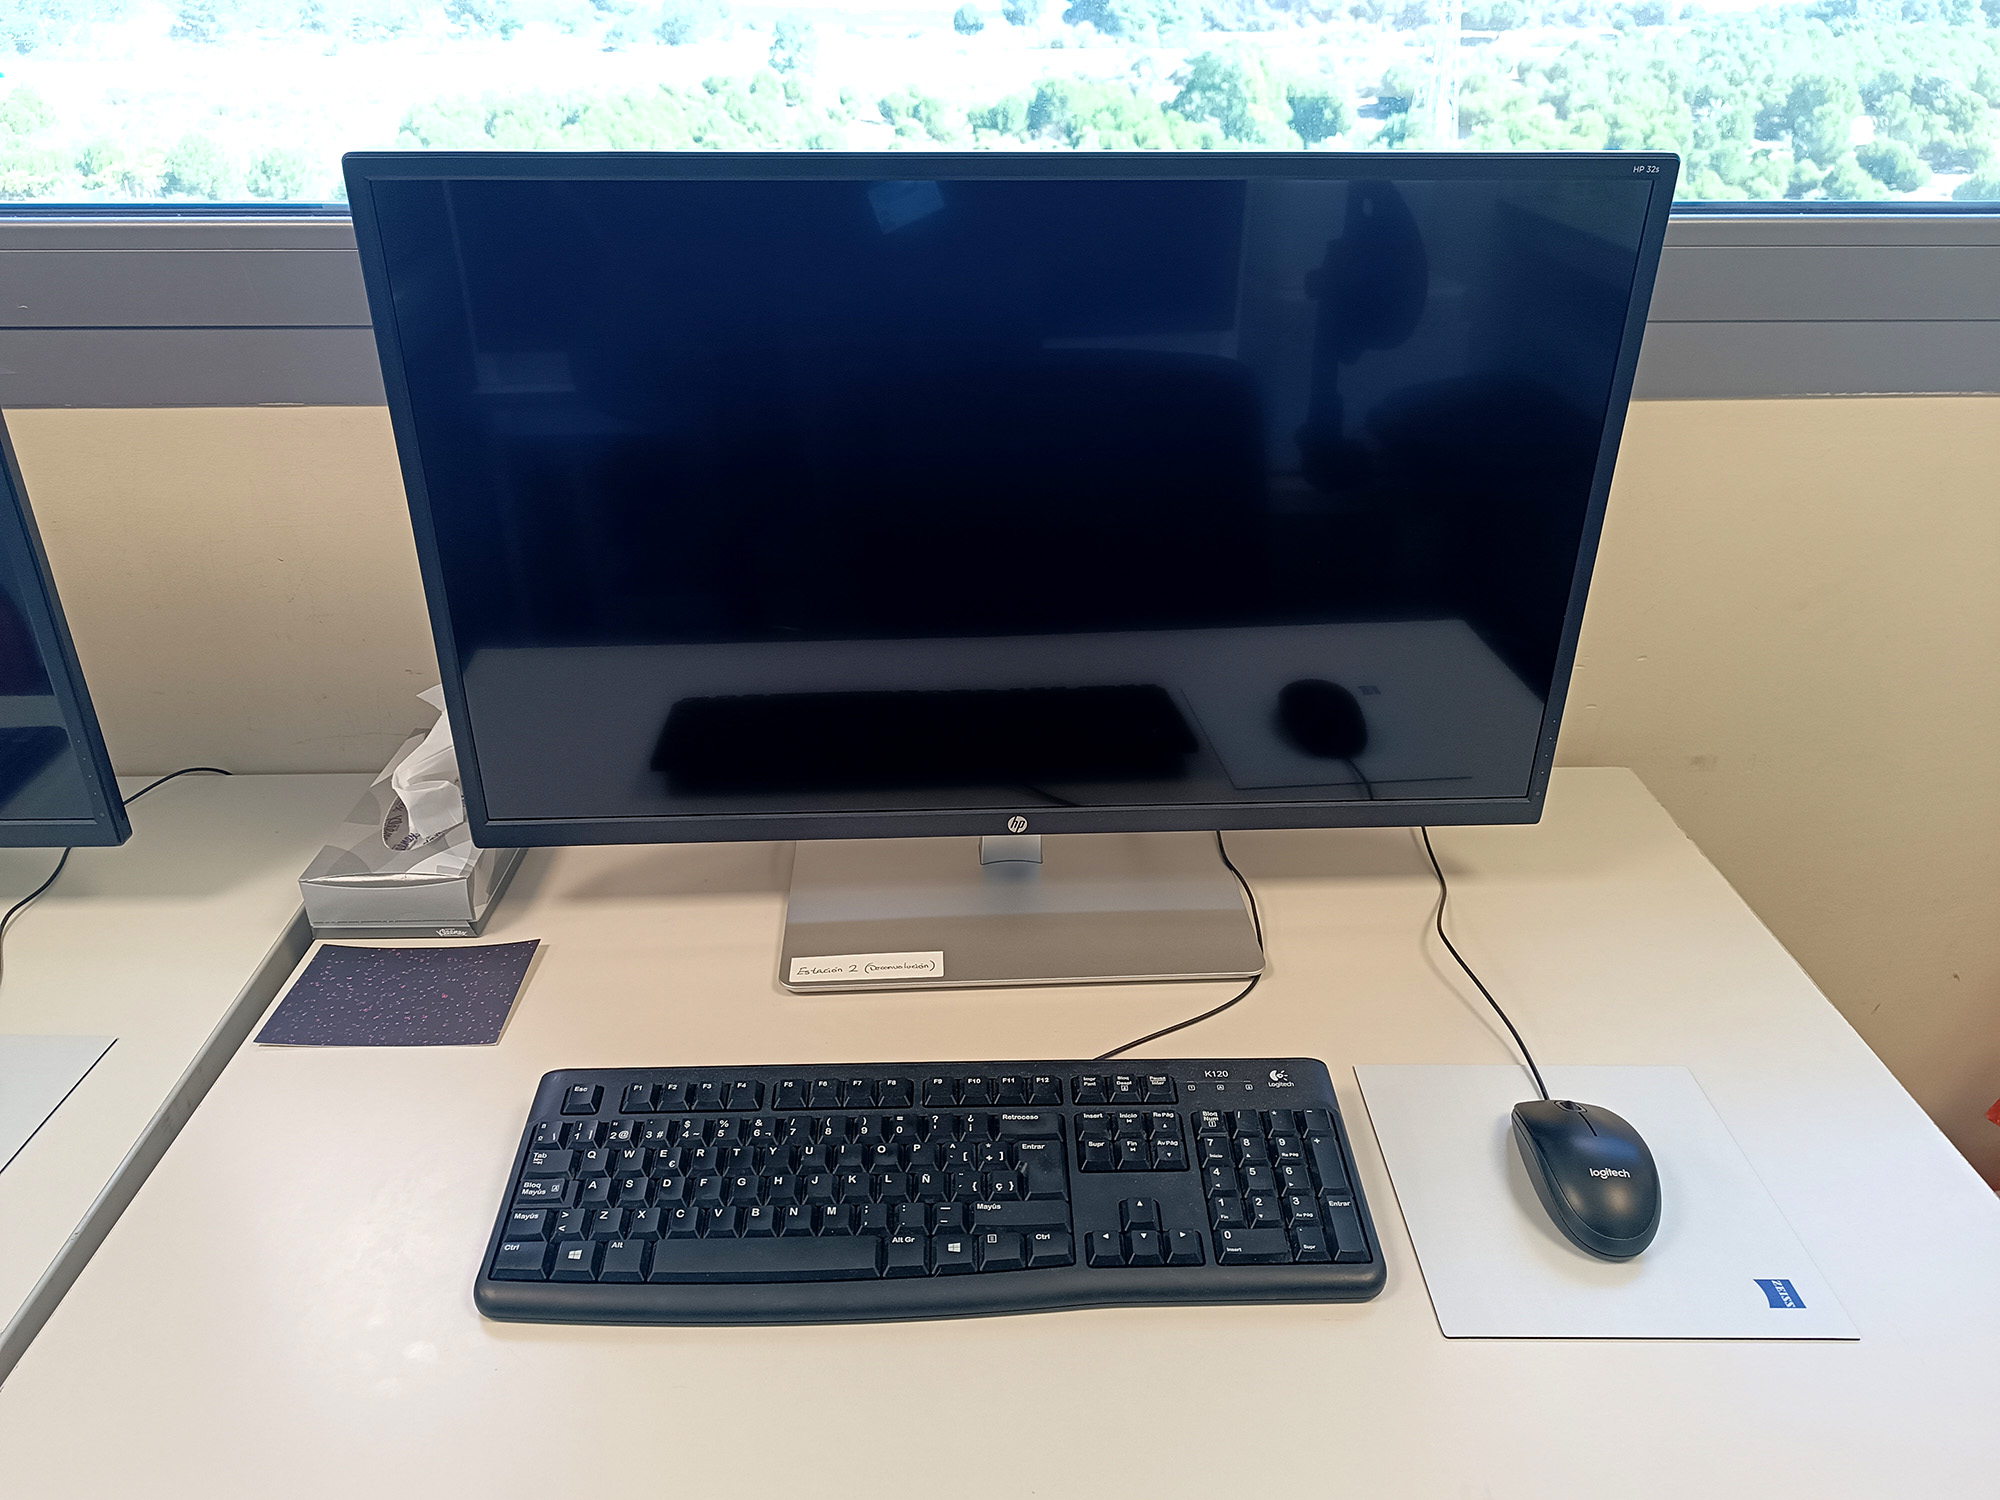
Workstation 2 (Deconvolution)
Location: 3rd Floor (Lab. 310)
Hardware:
- Processor: AMD Ryzen 5 3600
- 64 Gb RAM
- Nvidia Geforce GTX 1660 SUPER 6Gb
- HP 30” Monitor
Software:
- Huygens 19.10
- Zen 2 Blue
- NIS Viewer 5.12
- Imaris Viewer 9.5.4
- LAS X 3.7.0
- Fiji
- VIAS
- NeuronStudio
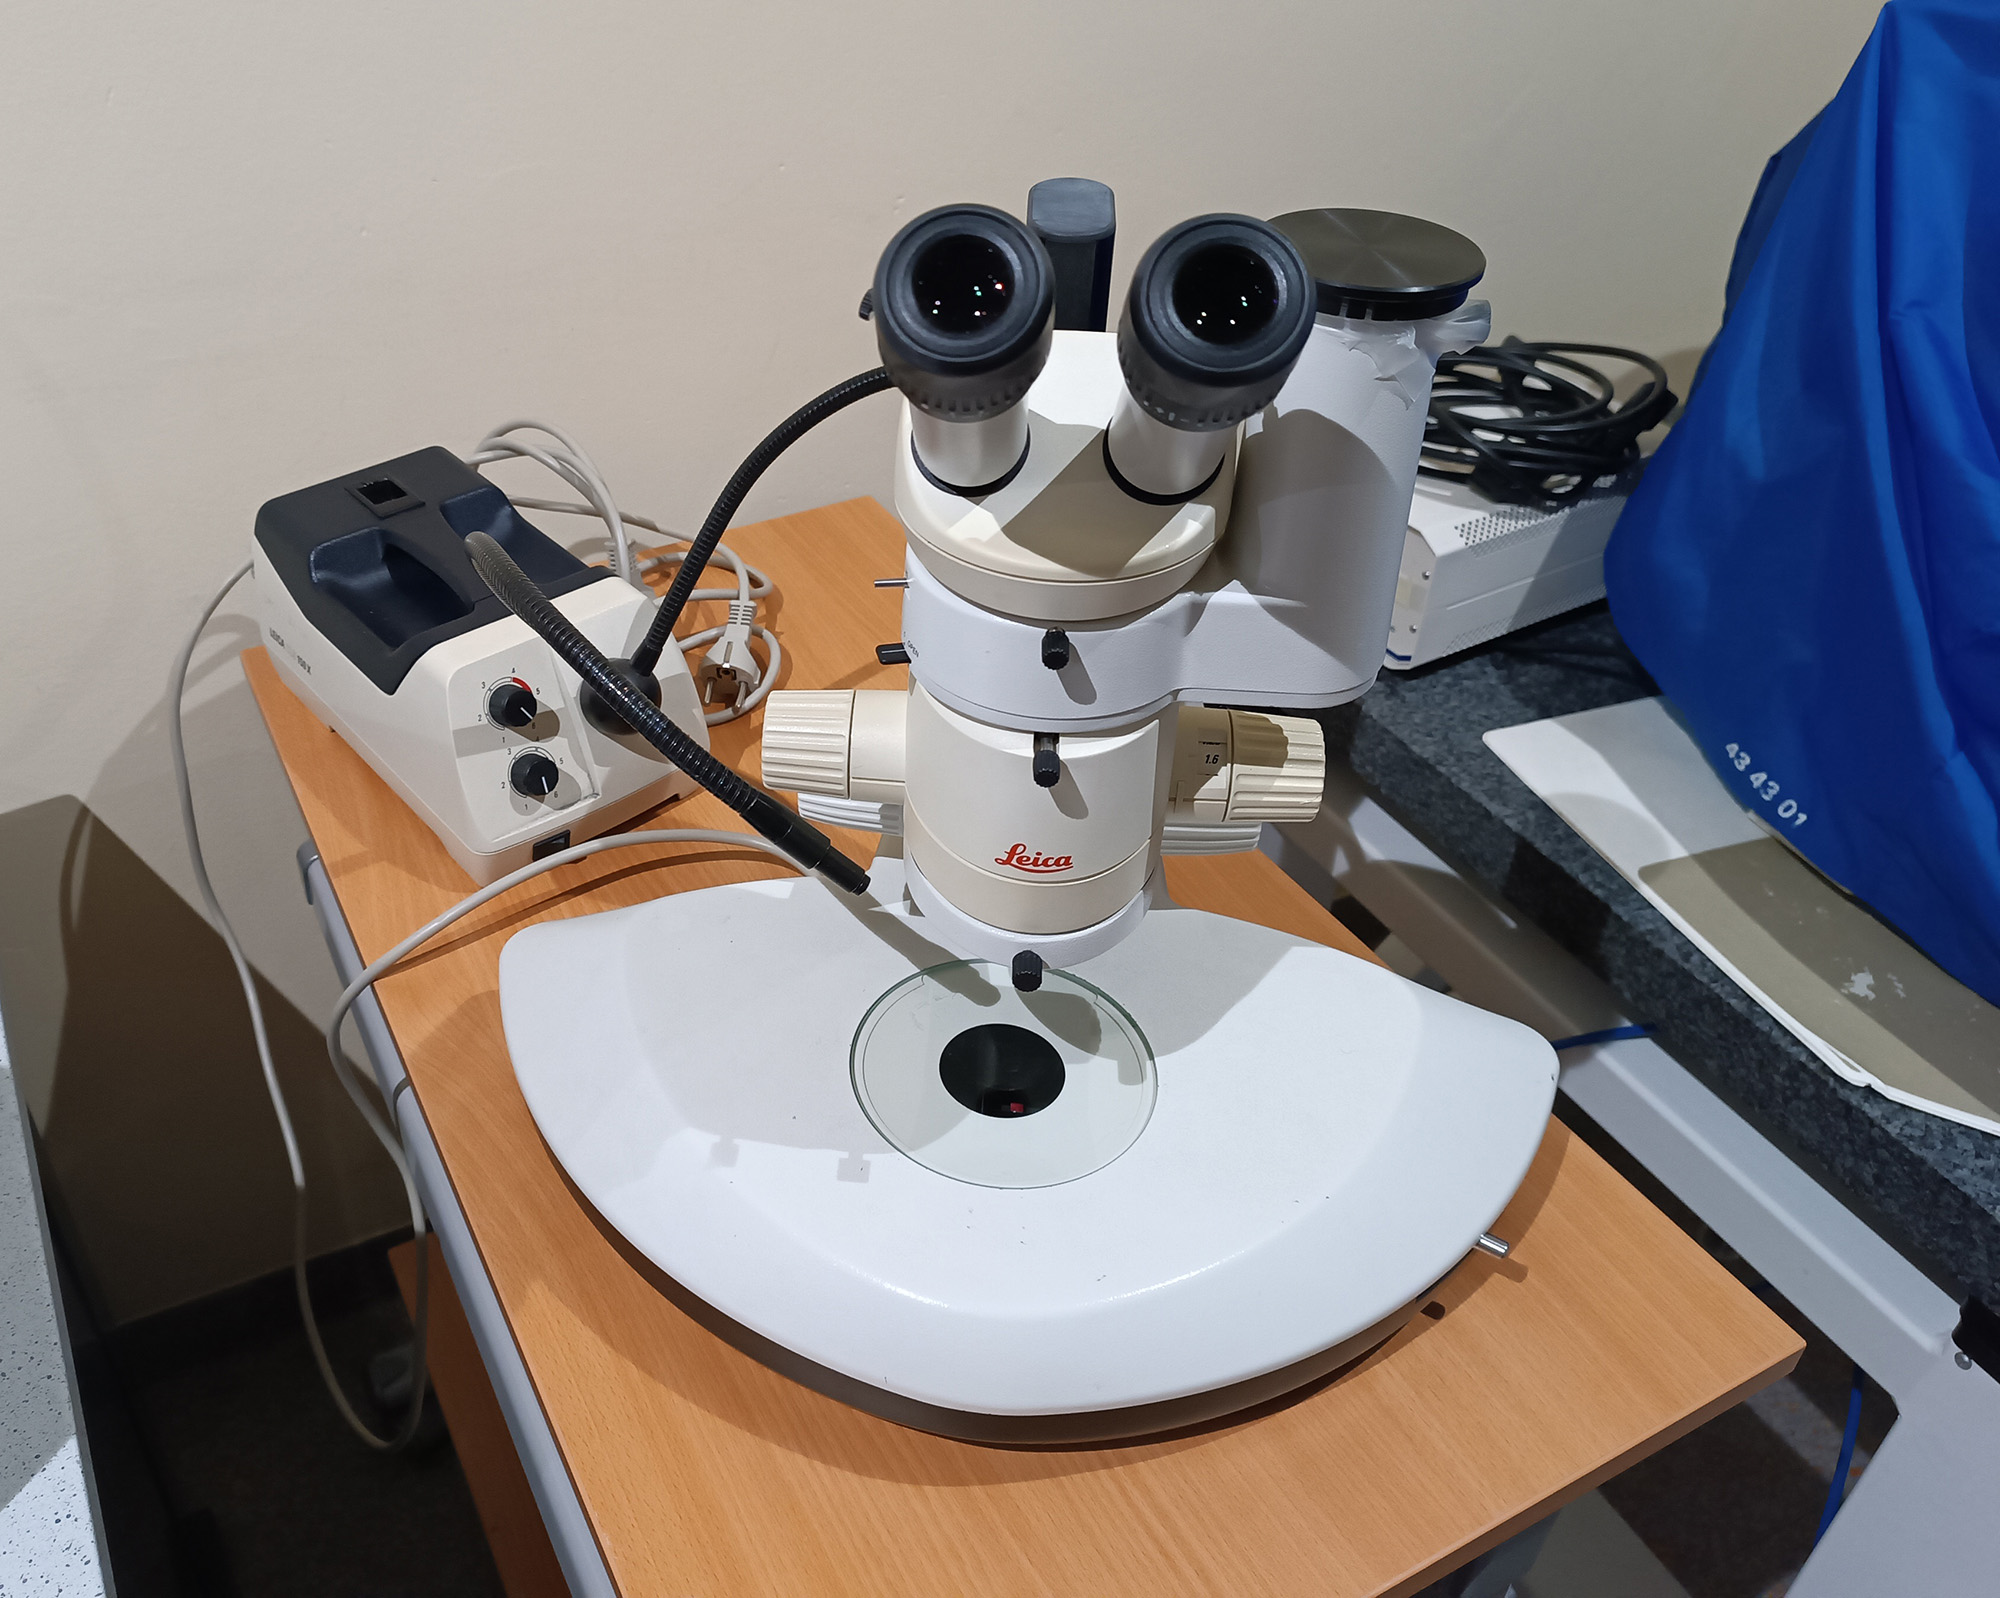
Stereo Microscope with Cold Light (Leica)
Manufacturer: Leica
Equipments: 1
Location: 3rd Floor (Lab. 335)
Technical Specifications:
- MZ6 Magnifying glass (6.3X a 40X) (Leica)
- Diascopic and episcopic light
- Cold light source CLS 150X (Leica)
- EOS 450D digital reflex camera (Canon)
- SE16LA Photo Adapter (QIOptiq)
- EOS 450D Camera (Canon) (Guide)
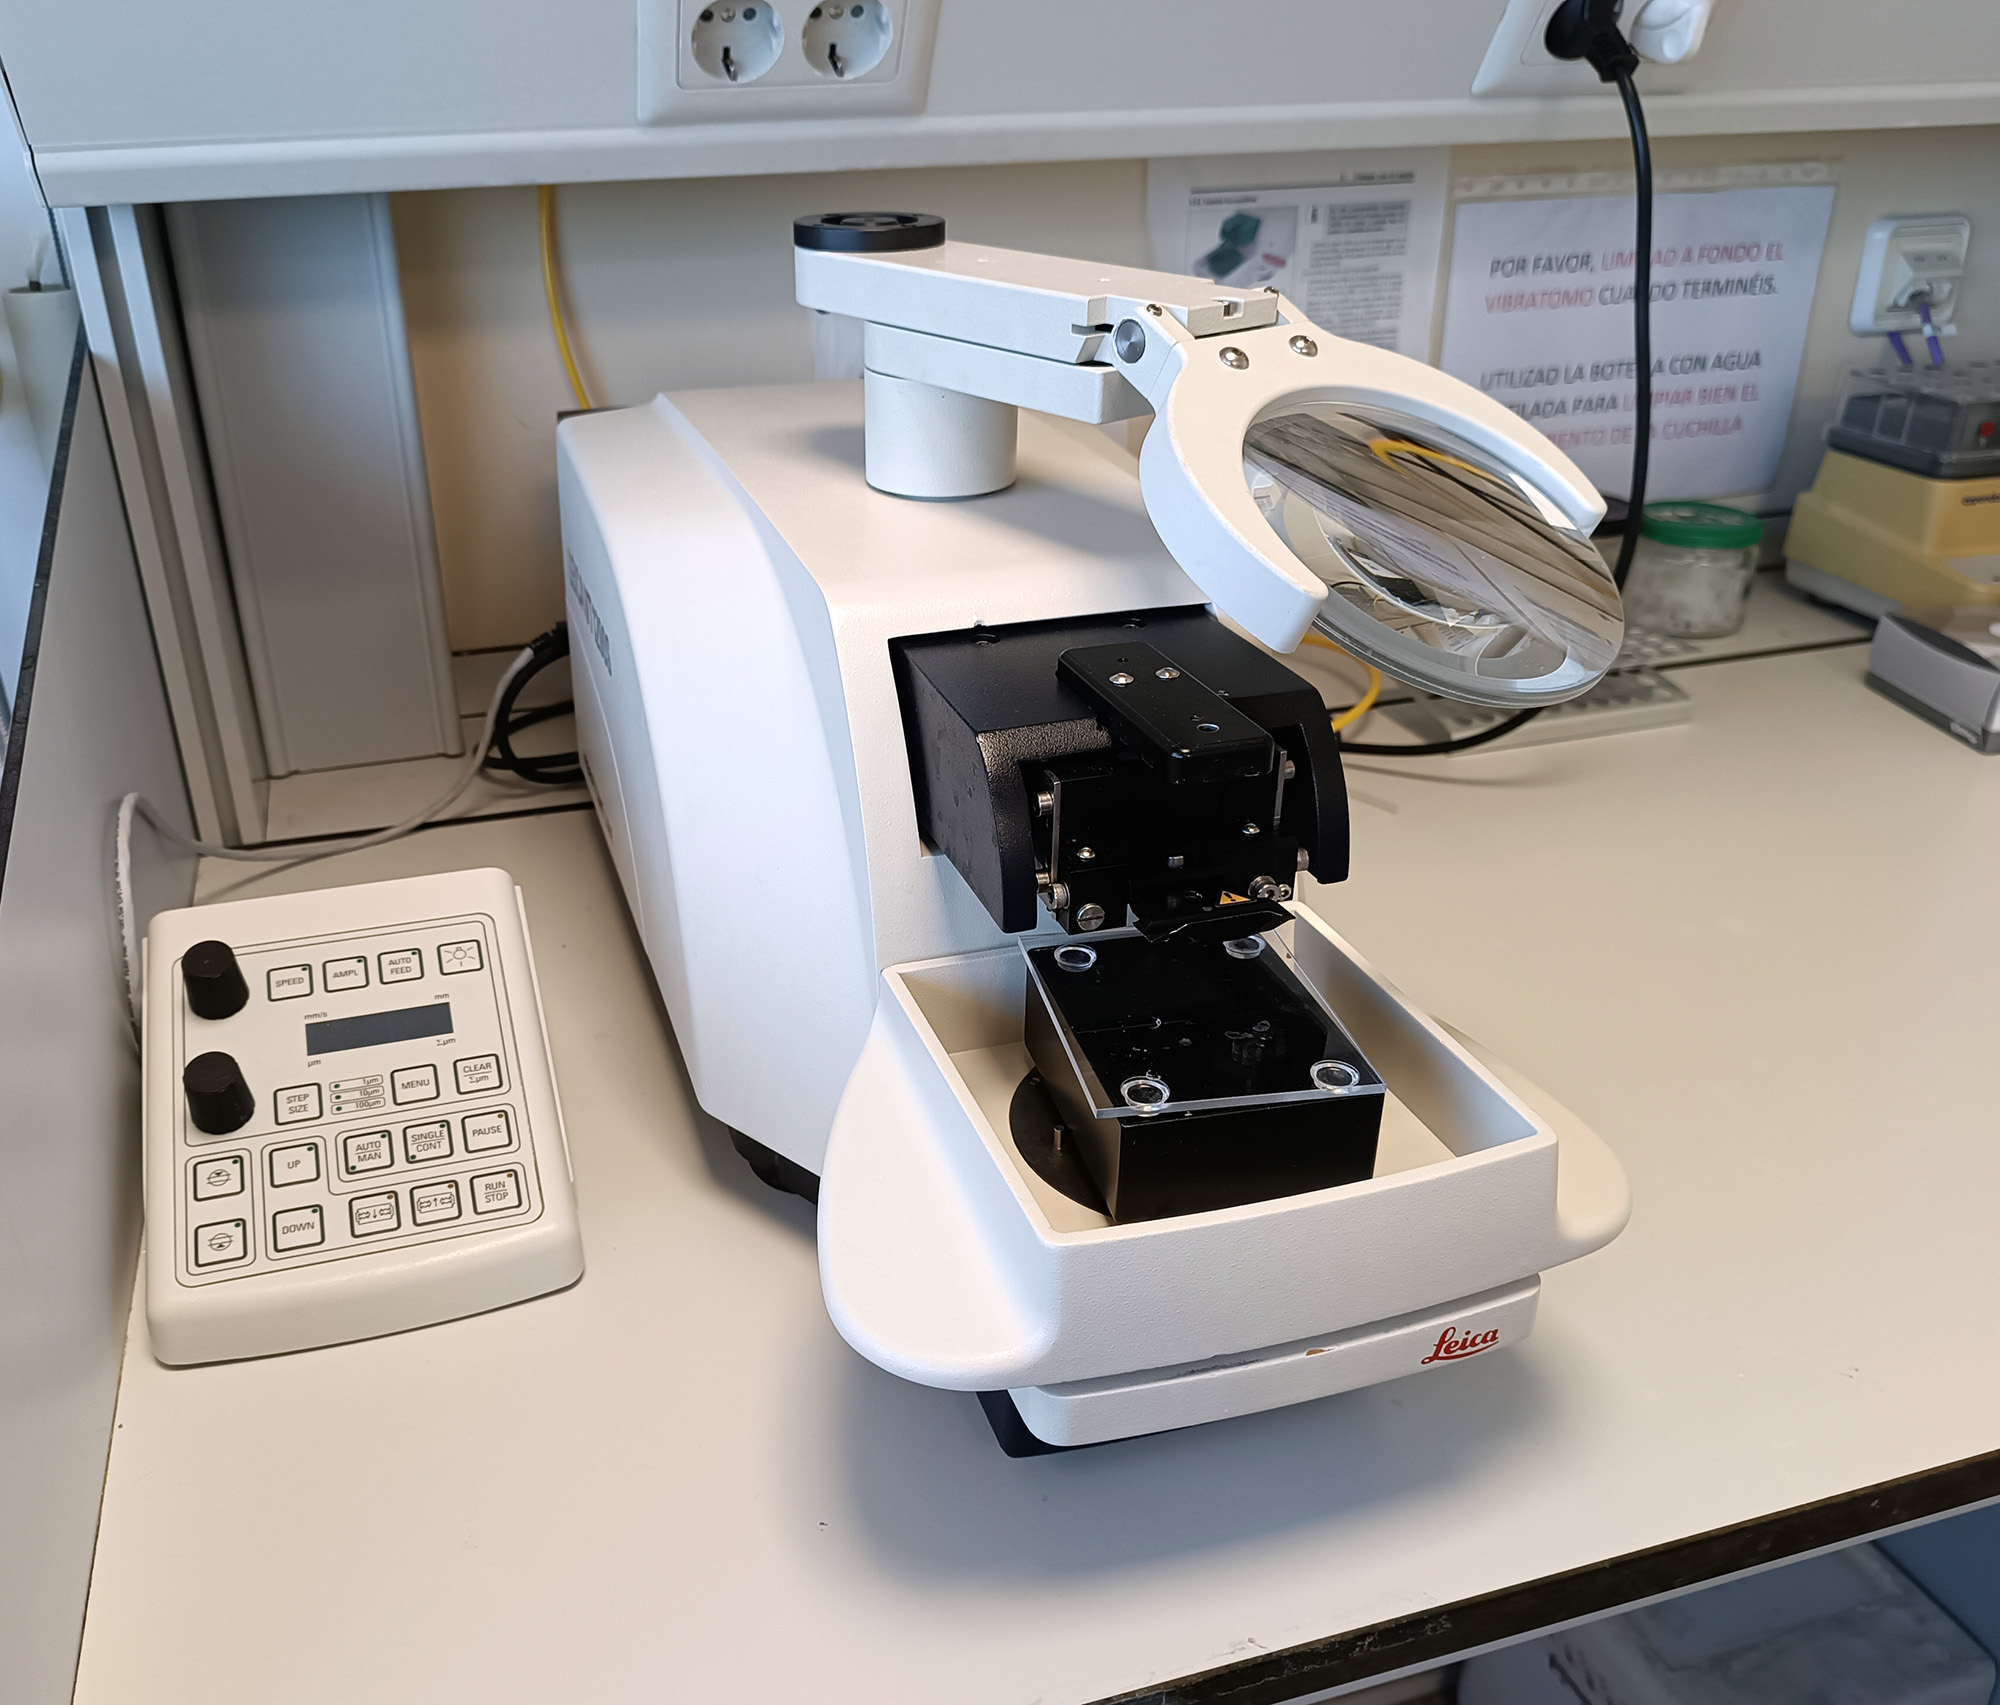
VT1200S Vibratome (Leica)
Location: 3rd Floor (Lab. 310)
USER GUIDE (Available under "Documents" at the PPMS Booking Systems)
Histology Tutorials (The Internet Pathology Laboratory for Medical Education)
Explicative Videos about how to use this Vibratome and the technique (Leica)
- 2.5x (dry) / 0.075 Plan-Neofluar. Brightfield (H)
- 20x (dipping) / 0.5 N-Achroplan. Brightfield (H) and Nomarski (DIC II)
- 40x (dipping) / 1.0 Plan-Apochromat. Brightfield (H) and Nomarski (DIC III)
- 63x (dipping) / 1.0 Plan-Apochromat. Brightfield (H) and Nomarski (DIC III)
- 25x (Water)
- 40x (Water) / 1.2 Water C-Apochromat. Brightfield (H) and Nomarski (DIC III)
- 63x (Water) / 1.2 Water C-Apochromat. Brightfield (H) and Nomarski (DIC III)
- 100x (Oil) / 1.4 Plan-Apochromat. Brightfield (H) and Nomarski (DIC III)
- Check the excitation and emission spectra of the florophores and fluorescent proteins in order to optimize the method used for imaging.
- When a fluorescent protein (FP) is used for the first time check the emission spectrum, by spectral detection, to ensure the real identity of the protein.
- The laser line 405 nm may photoconvert your FP (change the emission profile). Check it.
-
Spectrum displays for the selection of fluorescent fluorophores and proteins
- Ask yourself the question, is what I see though the eyepieces enough to draw the conclusions that I need in my experiment? If the answer is YES, you do not need to take the images in a confocal system. You will save time and money.
- To use oil immersion objectives, the sample should be assembled on 0.17 mm thick glass (No. 1.5) or polymer with optimal optical characteristics for high-resolution microscopy. Plastic surfaces will restrict imaging to long-distance (dry) lenses.
- In super resolution experiments the sample must be assembled on high quality 0.17 mm thick glass (No. 1.5H).
- If the sample is fixed, assembled in mounting medium, we will use F oil (refractive index RI = 1.518).
- If the sample is alive or immersed in a liquid medium we will use W oil (RI = 1,334), or silicone oil (RI = 1,406) specially for thick samples.
- It is crucial to prepare the following experimental controls:
- Autofluorescence: Performing the same protocol with no primary or secondary antibodies.
- Secondary antibodies: Staining the sample only with each one of the secondary antibodies.
- Crosstalk: Staining with each of the primary and secondary antibody combinations separately to image all channels with the same acquisition parameters as used in double or triple preparations.
- Simultaneous incubation versus sequential incubation: Although the simultaneous incubation in the same step with all the primary antibodies and then all the secondary antibodies is faster, it is more convenient to first incubate sequentially with one of the primaries, then its corresponding secondary, and so on.
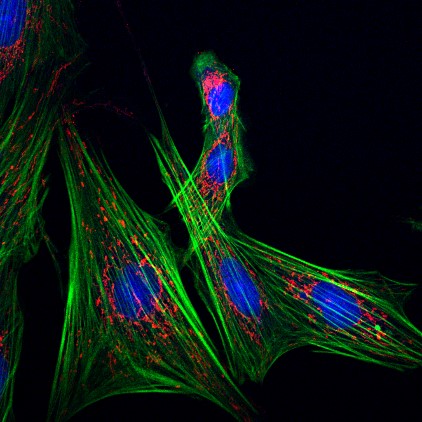
- Use green and red channels for colocalization experiments. In case of colocalizing a third channel, include far red. Avoid fluorophores close to UV due to possible chromatic aberrations.
- Pixel size should keep the Nyquist rate (https://svi.nl/NyquistCalculator). The SMOC has created a table for their equipment.
- It is convenient to do the subsequent deconvolution of the images.
- Turn the lasers (confocal microscopes) or the fluorescence lamp (widefield microscopes) on one hour before taking the images. In modern equipment, with solid-state lasers or widefield microscopes with LEDs, turning them on 10 minutes before is enough.
- Take all the images the same day. If not possible, batches of all conditions will be analyzed.
- Take the images with 12 bits, minimum.
- Avoid signal saturation and photobleaching.
- Culture medium should not contain phenol red to avoid background and phototoxicity. It is convenient that cells have been growing in this type of medium previously. Decreasing serum is also recommended if cell growth and viability are not altered.
- There are many media from different brands specifically formulated for microscopy, for example LiveLightTM (Cell Guidance Systems) or Live Cell Imaging Solution (Invitrogen).
- For long-term studies, image quality will go down (lower resolution, higher gain, lower lighting...) in order to decrease exposure times and avoid that the sample deaths.
- In case of confocal imaging choose a microscope with high sensitivity detectors, high-speed scanner and hardware autofocus, whenever possible.
- Place the plate in the microscope at least 30 minutes before starting the experiment.
- For long-term experiments, use a Teflon membrane (FoilCover from PeCon) to avoid the evaporation of the medium. Anti-evaporation oil like Ibidi Ref. 50051 or Sigma-Aldrich Ref. 5310 (this one mainly used in the preparation of embryo samples) can also be used.
- PTo avoid photobleaching an anti-fading like ProlongLive® can be added to the culture, or you can use special media like DMEMgfp-2 (Evrogen).
- For background removal you can add BackDrop (Invitrogen), or others.
- In the absence of a system controlling CO2 control in the microscope, 20mM HEPES will be added to the culture medium in order to maintain pH. In the market there are many media already formulated such as Leibovitz's L-15 (offered by various brands), CO2 Indpendent Medium (Gibco) or Opti-KlearTM (Marker Gene Technologies), among others.
- Cellular components that generate autofluorescence
- Sodium Borohydride (NaBH4)
- Treat the fixed coverslips with NaBH4 (1 mg/ml in PBS, pH 8.0) for 10 minutes at room temperature (RT)
- Wash with PBS and continue with the immunofluorescence protocol. This solution must be recently prepared, observing bubble formation
- Toluidine blue (C15H16N3ClS)
In cases that FITC is the detection method and mainly for tissues. This will decrease autofluorescence mainly due to chlorophyll and cell walls (elastin/collagen):- Incubate the tissues with 0.1% Toluidine Blue (Sakai, 1973. Stain Technology 48: 247-249). Incubation times could vary from several hours to overnight
- Wash off the solution excess
- Ammonium chloride (NH4Cl)
- Treat the fixed coverslips with NH4Cl (50mM diluted in PBS, pH 8.0) for 10 minutes at RT
- Wash with PBS and continue with the immunofluorescence protocol
- Sudan Black (C29H24N6)
- Treat the coverslips after secondary antibodies incubation with 0.3% Sudan Black (w/v) in 70% EtOH (v/v) for 10 minutes
- Wash extensively with PBS and proceed mounting the samples
- Trypan Blue (C34H28N6O14S4)
- Treat the coverslips after secondary antibodies incubation with 250µg/ml Trypan Blue in PBS pH 4.4, for 1 minute
- Wash extensively with PBS and proceed mounting the samples
- Autofluorescence Eliminator Reagent (EMD Millipore)
- FocusClear™ (CelExplorer)
- Vector® TrueVIEW® Autofluorescence Quenching Kit (Vector Laboratories)
| ARTÍCULO | FUENTE |
|---|---|
|
"Characterizing and Diminishing Autofluorescence in Formalin-fixed Paraffin-embedded Human Respiratory Tissue" |
Journal of Histochemistry & Cytochemistry 2014, Vol. 62(6) 405–423 |
|
"Simple Method for Reduction of Autofluorescence in Fluorescence Microscopy" |
The Journal of Histochemistry & Cytochemistry 2002, Vol.: 50 issue: 3, page(s): 437-439 |
|
"Reduction of Lipofuscin-like Autofluorescence in Fluorescently Labeled Tissue" |
The Journal of Histochemistry & Cytochemistry 1999, Vol. 47(6): 719–730 |
Paraformaldehyde 4% (PFA 4%)
Paraformaldehyde is a good fixation method for immunofluorescence assays. Although this method does not conserve the structural integrity of the cell as well as glutaraldehyde, the antegenic sites remains intact, this fixing method also does not generate too much autofluorescence.
- Preparation:
- Dissolve 4% paraformaldehyde (= 10% formalin) in distilled water preheated to 55-60ºC
- Add some drops of 1M NaOH and shake until completely dissolved
- Cool to room temperature (RT). Add PBS up to 1X and bring the pH to 7.4
- Do not keep this solution more tan a week at RT (it can be conserved frozen in aliquots at -20ºC for several months)
- Use:
- Wash the coverslips with PBS and fix them with PFA 4% added slowly, for 20-30’
- Wash the coverslips with PBS (3x5’)
- Keep the fixed coverslips at 4ºC in PBS with 0.01% Azide or start immunofluorescence assay
Formaldehyde-Acetone
- Use:
- Wash the coverslips with PBS at 37ºC
- Fix the cells with 4% PFA in PBS for 10’ at RT
- Wash the cells with PBS (3x5’)
- Permeabilize the cells with acetone at -20ºC for 10’. Incubate at -20ºC
- Next: a) Dry the coverslips and keep them at 4ºC or b) rehydrate them with PBS for 10’ at RT, and start the immunofluorescence assay
Formalin (Formalin solution, Sigma- HT501128)
- Use:
- Wash the coverslips with PBS and fix for 20 'with formalin adding it slowly
- Wash the coverslips with PBS (3x5’)
- Keep the fixed coverslips at 4ºC in PBS with 0.01% Azide or start immunofluorescence assay
Methanol
Methanol is a good fixation method if we want to conserve the structural integrity of the cell, although the antigenic sites of binding to the antibody can be damaged. In addition, for effective permeabilization it may be necessary to use an anionic detergent.
- Use:
- Wash the coverslips with PBS
- Add methanol at -20ºC slowly over the cells and incubate at -20ºC for 15’
- Remove the methanol, rehydrate by washing with PBS (2x5’) and start immunofluorescence assay directly with the primary antibody incubation
Acetone
With this fixation method, the antigenic antibody-binding sites are very well preserved and the amount of background fluorescence generated is very low. However, the structural integrity of the cell disappears, although when visualized in widefield the structure remains sufficiently intact to analyze the subcellular location of the protein of interest. However, when an attempt is made to make a 3D study using confocal microscopy, it is appreciated that the cells fixed by acetone have lost their three-dimensionality. The cell structure, unlike fixation by methanol, is not visible through transmitted light. Acetone is a good permeating agent so subsequent detergent treatment is not necessary.
- Use:
- Wash the coverslips with PBS
- Add methanol at -20ºC slowly over the cells and incubate at -20ºC for 10’
- Wash the cells with PBS (3x5’)
Acetone-Methanol
Using an acetone-methanol combination is due to a compromise between the destructive nature of acetone and the lack of labelling from methanol. Alhough it is recommended to look for the best ratio, sometimes, it is a good idea to start with a 50:50 ratio. In some cases, the best ratio is 20:80 (acetone:methanol).
- Use:
- Wash the coverslips with PBS
- Add acetone:methanol at -20ºC slowly over the cells and incubate at -20ºC for 15’
- Remove the mixture and rehydrate by washing with PBS (2x5’). Start the immunofluorescence assay with the primary antibody incubation
Glutaraldehyde
Glutaraldehyde is the standard fixation method for electron microscopy. It preserves the structure very well, but unfortunately destroys most of the antibody-binding sites, generating, in addition, much autofluorescence in fixed cells. Incubating fixed cells with sodium borohydride solution for several minutes can decrease the amount of autofluorescence that is generated during the fixation with glutaraldehyde. A good solution, may be using a combination of 0.25% glutaraldehyde with paraformaldehyde.
Essential and Mandatory Controls in Microscopy:
- Autofluorescence: Performing the same protocol with no primary or secondary antibodies.
- Secondary antibodies: Staining the sample only with each one of the secondary antibodies.
- Crosstalk: Staining with each of the primary and secondary antibody combinations separately to image all channels with the same acquisition parameters as used in double or triple preparations.
- Simultaneous incubation versus sequential incubation: Although the simultaneous incubation in the same step with all the primary antibodies and then all the secondary antibodies is faster, it is more convenient to first incubate sequentially with one of the primaries, then its corresponding secondary, and so on.
- If necessary, remove autofluorescence.
- Treat the coverslips with 0.1% Triton X-100 in PBS for 10 minutes at room temperature (RT).
- Incubate the coverslips with Blocking solution (1-5% BSA or 1-5% Foetal Calf Serum (FCS) + 0.1% Triton X-100 in PBS), or MAXblock™ Blocking Medium (Active Motif), for 10 minutes at RT.
- Incubate the cells with the primary antibody diluted in Blocking solution for 1h at RT. In order to remove aggregates and/or reducing background staining, centrifuge the antibodies in a minifugue at 12.000xg for 5 minutes at 4°C, previously.
- Wash the coverslips by submerging them in PBS 3 times.
- Incubate the cells with the secondary antibody diluted in Blocking solution for 45 minutes at RT and darkness. In order to remove aggregates and/or reducing background staining, centrifuge the antibodies in a minifugue at 12.000xg for 10 minutes at 4°C, previously.
NOTE. In case of using phalloidins, it is better to prepare the secondary dilution in PBS only. - Wash the coverslips by submerging them in PBS 3 times.
- Submerge the coverslips in distilled water once, and blot excess on paper.
- Pass the coverslips briefly in EtOH and blot excess on paper (This step is not strictly necessary).
- Immediately afterwards mount the coverslips on slides.
- Sample MOUNTING:
- With a yellow tip, place a drop of mounting medium on the slides.
- Then gently place the coverslip with the cells face-down on the drop of mounting medium and press lightly with filter paper so that only a thin layer of mounting medium remains between the slide and the cover.
IMPORTANT. In case of very thick preparations, be careful with the previous step because the real volume of the simple could be altered. - Let dry for 24h at RT and darkness on filter paper. Samples can be dried in an oven at 37°C for 3-4h, but preferably at RT.
- Seal the edges with nail polish. Only if the preparations will be stored for a long time.
- Stored at 4°C in the dark they can last for many months. Never store the preparation at 4°C before it is completely dry.
NOTE: If possible, carry out the following steps with floating sections and on a rotary shaker.
- Use some method to remove autofluorescence.
- Incubate with the permeabilization solution (0.1% Triton X-100 in PBS) for 15 minutes at room temperature (RT).
- Incubate with blocking solution (1% FCS + 0.1% Triton X-100 in PBS) for 1-2 hours at RT.
- Incubate with the primary antibody diluted in the blocking solution, overnight at 4°C. Centrifuge it previously at 12,000xg in the minifuge for 10 minutes at 4°C. For sections larger than 50 microns it is possible to extend the incubation for two nights by doing it at RT. In this case, add 0.02% Sodium Azide.
- Wash 5 times for 5 minutes with PBS.
- Incubate with the secondary antibody diluted in the blocking solution for 12-18 hours at RT in the dark. Centrifuge previously at 12,000xg in the minifuge for 10 minutes at 4°C.
- Wash with the permeabilization solution for 1 hour with frequent changes.
- LWash with PBS for another hour with frequent changes. The sections can be stored in PBS or 4% Paraformaldehyde (PFA) for several days. It is preferable not to go to the next step until they are going to be observed.
- Put the sections on slides, add mounting medium and place a cover on top.
NOTE: the whole process is carried out with the tissue sections (50-100 µm) in suspension.
- Fix in PFA 4% overnight (ON) at 4°C.
- Wash 2 times for 5 minutes with PBS pH 7.4.
- Incubate with the permeabilization solution (0.1% Triton X-100 in PBS) for 15 minutes.
- Incubate with 0.003% H2O2 in PBS for 30 minutes at room temperature (RT) to reduce endogenous peroxidase activity.
- Wash with PBS 3 times for 5 minutes.
- Incubate with blocking solution (1% serum + 0.1% Triton X-100 in PBS) for 15 minutes at room temperature.
- Incubate with the primary antibody overnight at 4°C diluted in the blocking solution. Centrifuge it previously for 10 minutes at 12,000xg in the minifuge at 4°C.
- Wash 5 times for 5 minutes with PBS.
- Incubate with the peroxidase-coupled secondary antibody for 1h at RT diluted in the permeabilization solution. Centrifuge it previously for 10 minutes at 12,000xg in the minifuge at 4°C.
- Wash 5 times for 5 minutes with PBS.
- Wash 2 times for 5 minutes with 100 mM Tris pH 7.6.
- Develop the reaction with 0.5-1 mg/mL DAB (3,3'-diaminobenzidine) + 0.06% H2O2 in 100 mM Tris pH 7.6. No more than 10-15 minutes.
- The reaction can be intensified with NiCl2 and CoCl2 (1%) in 100 mM Tris pH 7.6.
- Stop the reaction by adding 0.05% Azide.
- Wash 3 times for 5 minutes with PBS.
- Mount the sections with mounting medium on a slide. Place a coverslip on top.
Protocol elaborated from “Unraveling human adult hippocampal neurogenesis”. Nat Protoc 15, 668–693 (2020).
NOTE: The following conditions are suitable for particular primary antibodies and 50 µm human brain sections. Try different incubation times to set the antibodies of interest.
- Fixation: Immediately after extracting and dissecting the tissue, immerse it in 4% PFA for 24h at 4 ° C. Wash 3 times for 30 seconds with 0.1N PB (phosphate buffer) at room temperature (RT).
- Embed the tissue in agarose:
- Prepare a solution of 10% sucrose-4% low-melting point agarose, heated in the microwave to make it liquid and fill the well of a M6-M12 plate.
- Put the plate on ice and immerse the tissue. It may float for the first 2 minutes. Push it to the bottom to avoid it and wait for the agarose to completely solidify.
- Cut a cube containing the tissue, with 2-3 mm extra agarose in all dimensions.
- Sectioning: Cut 50 µm sections on the vibratome, collecting the sections in 0.1 N PB.
- Incubate the sections with 0.5% NaBH4 in 0.1N PB for 30 minutes (this step is not necessary if the tissue comes from mice). Put the plate at RT on an orbital shaker with gentle shaking. The appearance of bubbles is frequent.
- Wash 5 times for 30 seconds with PB-Triton-BSA (PBT-BSA).
- Antigen retrieval (antigen retrieval) with citrate (HC-AR), if necessary:
- Fill 10 mL glass vials with 5 mL of 1x Citrate buffer (pH 6.0) preheated at 90 ° C (make the buffer just before using).
- Place 1 to 4 sections belonging to the same type of sample in each glass vial, and close without sealing it to avoid a pressure increase during microwave heating.
- Subject the vials to 5-6 cycles of 10-20 seconds in a microwave (800W at maximum power). To avoid tissue damage, the liquid should never be boiled, in which case microwave cycles should be suspended. Wait a few seconds between each microwave cycle.
NOTE. This process should be repeated until the edges of the sections begin to curve slightly, stopping as soon as this effect occurs. Excessive folding of the edges of the sections should be avoided to avoid damaging the sample, the appearance of backgrounds and to preserve the specificity of the signal. - Close the vials well and immerse them in a water bath at 80 ° C for 20 minutes.
- Leave the vials closed for 20 minutes at RT.
- Remove the sections from the vials with the help of a soft brush and wash them 5 times for 30 seconds in 0.1 N PB.
- Incubate with the primary antibody. Put the primary antibody diluted in PBT-BSA in each well of an M24 plate, place the sections in the wells and make sure that they are floating (350-400 µl per well in this type of plate is suitable for incubating up to two sections). Incubate for 5 days at 4 ° C with gentle shaking. Incubation conditions and time must be adjusted experimentally for the antibodies used.
- Wash sections 5 times for 30 seconds with PBT-BSA.
- Incubation with the secondary antibody. Put the secondary antibody diluted in PBT-BSA in each well of an M24 plate (500 µl per well is suitable for up to three sections). Incubate in the dark overnight (ON) at 4 ° C with gentle shaking.
IMPORTANT. From this step the sections should be kept in the dark. For this, aluminium foil can be used. - Wash the sections three times for 30 seconds with 0.1 N PB.
- Incubation with DAPI (optional). To stain the nuclei, the floating sections can be stained with DAPI (1: 5000 v/v in 0.1 N PB) for 10 min at RT with gentle shaking. A volume of 500 µl per well (M24) can be used to stain a maximum of three sections.
- Wash sections 3 times for 30 seconds with 0.1 N PB at RT.
- Autofluorescence removal:
- Immerse the sections in 1 mL of 70% ethanol for 5 minutes with gentle shaking. In an M24 a volume of 500 µl is sufficient for a maximum of three sections per well.
- Incubate sections in commercial Autofluorescence Eliminator Reagent (EMD Millipore, Cat#2160) (Sudan Black diluted in ethanol) for 5 minutes with vigorous shaking to prevent reagent precipitation. In an M24 a volume of 200-300 µl should be sufficient (take in mind that the sections will be stained black). This treatment should be adjusted according to the native autofluorescence of the tissue.
- Wash the sections 3 times for 1 minute with 1 mL of 70% EtOH with strong shaking. Make sure that the Autofluorescence Eliminator precipitates are removed with these washes.
- Wash the sections 3 times for 30 seconds in 1 mL of 0.1 N PB at RT with gentle agitation.
- Mounting the sections. Place the sections on a slide treated with 2% gelatine. The use of a commercial mounting medium or not is optional. Once the mounting medium has been added, place a coverslip and allow the preparation to dry, protecting it from light. Wipe off excess mounting medium carefully.
- Samples can be stored at RT in the dark. It is recommended to acquire the images within the month following assembly.
USED SOLUTIONS
- 10% sacarose-4% low-melting agarose (500 mL)
- Heat 500 mL of 0.1 N PB.
- Add 50 g of sucrose and mix on a magnetic stirrer.
- Once the sucrose has completely dissolved, add 20 g of Low Melting Point agarose. Warm in a microwave until bubbles begin to form. Shake and rewarm. Repeat until transparent and slimy.
NOTE. The solution can be stored at -20 ° C for 6 months or at 4 ° C for a week.
- 0.1 N PB Solution (1 L)
- Add 14 g of K2HPO4 to 800 mL of bidistilled water.
- Once completely dissolved, add 2.65 g of NaH2PO4-H2O.
- Adjust the pH to 7.4 and make up to 1L with distilled water.
NOTE. It can be prepared and stored at RT for up to 6 months.
- PB-Triton-BSA Solution (PBT-BSA) (100 mL)
- Dissolve 1 g of BSA (1% w/v) in 100mL of 0.1 N PB.
- Add 1 mL of Triton-X-100 (1% v/v) and mix on a magnetic mixer until completely dissolved.
NOTE. The PBT-BSA solution can be stored at 4°C for one week
- 2% gelatine-coated glass slides
- Dissolve 6 g of porcine gelatine in 300mL of hot bidistilled water on a magnetic mixer.
- When completely dissolved, add 0.5 g of KCr(SO4)2.
- Pour 250 mL of this solution into the slide cell.
- Place 10 slides in the holder and immerse them in the gelatine solution for 1 min.
- Allow slides to dry ON before use.
NOTE. These slides can be stored at RT for 6 months.
- Fix with 4% PFA for 20 minutes.
- Block for 1 h in PBT 10 (10% BSA + 0.1% Tween-20 in PBS).
- Incubate with primary antibody: dilute in PBT 1 (1% BSA + 0.1% Tween-20 in PBS) and incubate overnight (ON) at room temperature (RT).
- Wash several times in PBT 1 (1% BSA + 0.1% Tween-20 in PBS) for 1-2 hours.
- Incubate with secondary antibody: dilute in PBT 0.1 (0.1% BSA + 0.1% Tween-20 in PBS) and incubate 2-4 hours in the dark.
- Nuclei staining (optional): incubate with Hoescht 5 µg/ml in PBT (0.1% Tween-20 in PBS) for 10 minutes.
- Wash several times with PBT (0.1% Tween-20 in PBS) for 30 minutes.
- Mount with Vectashield.
- Test different mounting media because it may happen that the signal of some channel diminishes or even disappears simply by using a media incompatible with the staining we are carrying out.
- For 3D analysis, the mounting medium used must not harden.
- Mix 6 g. of glycerol with 2.4 g. of Mowiol (Calbiochem Ref.475904, Polysciences Ref.17951) in a 50 ml centrifuge tube with a magnetic stir bar.
- While mixing, add 6 ml of MiliQ water and leave for 2 hours at room temperature (RT).
- Add 12 ml of Tris 0.2M, pH 8.5 and 230 μl of Thimerosal 1% (w / v in water) (antibacterial and antifungal agent).
- Incubate in a 50 ° C bath for 10' with frequent agitation to dissolve the Mowiol. This operation should be repeated until the Mowiol is completely dissolved.
- Add 2.5% DABCO (1,4-diazobicyclo- (2,2,2) -octane).
- Centrifuge at 5000xg for 15' to remove fines. Store in 1 ml aliquots at –20ºC. It is stable for one year. After using, store at 4ºC (until one month). Discard it when crystalline deposits begin to appear in the preparations.
- Mix 2 g. of n-propyl gallate, 40 ml of glycerol, in 10 ml 1X PBS.
- Mix agitating and heating 40-50ºC until the n-propyl gallate is completely dissolved (about 1h).
- Adjust pH to 7.6.
- Store at 4ºC protected from light.
- Mix 0.5% p-phenylenediamine (Free Base) in 20mM Tris, pH 8.8, 90% glycerol.
- Dissolve by bubbling nitrogen for 3-4h.
- Store at –20ºC.
- Make new medium when it adopts a dark brown color.
- Add 4.8 g. of polyvinyl alcohol (PVA) to 12 g of glycerol mixing well.
- Add 12 ml of distilled water and agitate overnight at RT.
- Add 24 ml of 0.2M Tris-HCL pH 8-8.5.
- Heat in a 50°C with agitation for 30'.
- Add 1.25 g of DABCO mixing well.
- Centrifuge at 10,000xg in minifuge for 5'.
- Aliquot the supernatant and store at -20°C.
Note: The medium polymerizes in contact with air, tightly sealing the perimeter of the cover. If you want to remove it, just wet it in buffer.
- Mix 100 ml glycerol, 5 g (n-propyl gallate), 0.25 g DABCO (1,4-diazobicyclo- (2,2,2) -octane) and 0.0025 g PPD (para-phenylenediamine).
- Cover with aluminum foil to protect from light and mix on a shaker overnight.
- Store at 4ºC.
Usage:
- Wash with PBS pH 8-8.5.
- Dry PBS well.
- Cover with the previous mixture for 5'. Then remove the remains of the solution.
- Make the assembly with this solution.
|
Curing (hard-set) |
ProLong Glass, Diamond, Gold. (ThermoFisher Scientific) |
|
Vectashied Vibrance (Vector Laboratories). |
|
| Aqueous (non-hardening) |
Vectashield (Vector Laboratories) |
|
Fluoromount G (ThermoFisher Scientific) |
|
|
Glycerol (several companies). 50% (DIC), 75% (DIC+IFI), 90% (IFI) |
Previous coverslip treatment/cleaning
- Heat the covers in a shaker at 50-60°C immersed in 1M HCl for 4-16 hours.
- Let cool.
- Wash with distilled water several times.
- Immerse in 95% ethanol and allow to dry on whatman filter paper.
- Sterilize with UV light before culturing the cells.
- Sometimes it is necessary to treat the coverslips for cell growth. There are some protocols and commercial products that we can use:
- Various markers (Enzo Life Sciences y Thermofisher).
- Cell membrane markers (CellVue).
- Expression vectoirs and fluorescent proteins (EvroGen).
- SNAP-tag and CLIP-tag (New England Biolabs).
- SiR dyes: cytoskeleton in vivo markers (Spirochrome).
- Component to add to the culture medium and maintain the pH (Hepes).
- Media to avoid “bleaching” (antifading ProLong TM Live and Live Cell Visualization Medium DMEM GFP_-2).
- Specific culture media for in vivo experiments (Live Cell Imaging Solution and LiveLight Photostable Media).
- To decrease autofluorescence in cultures (BackDrop™)
- Gels to create cameras for the study of aquatic microorganisms (Carolina Observation Gel).
- Culture and hybridization chambers (Incubations chambers and Specimen Preparation and Embedding Supplies).
- To maintain humidity (with gas exchange) in long-term experiments (Anti-Evaporation Oil , Mineral oil and FoilCover).
- Perfusion systems available at the SMOC.
- FRET concepts (Microscopy Primer)
- FRET videos (Jove)
- FRET Basics and Applications (EMBL)
- Article on FRET calculations (Nature protocols, 8. 2013. Broussard, et. al.)
- Metamorph FRET App (Molecular Devices) and webinar.
- FRET Plus and FRET Free Apps (Zeiss) [Available at SMOC equipments]
- Various Image J/Fiji plugins:
- FRET analysis by Biosensor FRET.
- FRET analysis by Acceptor Photobleaching (FRETcalc)
- For radiometric FRET calculations (RiFRET)
- For FRET calculations by spectral unmixing (FRETTY)
- FRET analysis by Sensitized Emission (Fret_Analyzer)
- For SBT corrections in FRET by Sensitized Emission (PixFRET)
- FRAP videos (Jove)
- Tutorials and FRAP analysis material (EMBL):
- What do FRAP curves tell us? (Kota Miura).
- Analysis of FRAP Curves (Kota Miura)
- Lecture Notes: FRAP internal (Kota Miura)
- How FRAP works (Stefan Terjung)
- FRAP Teaching Module (Stefan Terjung)
- Articles about FRAP:
- Software for FRAP assessment (Easy FRAP)
- Software for FRAP assessment (Easy FRAP-web)
- FrapCalc (Kota Miura)
- Image J/FIJI plugin for FRAP analysis (sim-FRAP)
- FRAP Analysis
- Correcting drift in FRAP experiments.
- Fluorescent Proteins and Related Assays
- Fluorescence Quantification with Fiji
- A basic guide of ImageJ/Fiji particle counting tools
- A general view of the basic Fiji/ImageJ tools
- Introduction to image processing and object segmentation using Fiji/ImageJ
- Quantitative colocalization
- ImageJ-particle counting
Esta macro permite guardar todos los canales de una imagen por separado y una imagen de combinación de todos ellos.
FUNCIONAMIENTO DE LA MACRO:
1º Seleccionar la carpeta donde están las imágenes para contar.
2º indicar la carpeta donde se guardarán los resultados (Se crea una nueva carpeta “Resultados”).
3º Indicar el formato de las imágenes (tif, lif, lsm, czi, nd2, vsi, ics).
4º Seleccionar el color para cada canal.
Nota: Si alguno de los parámetros no se introducen correctamente la macro lanzará un error y se parará.
- Pasos del tratamiento:
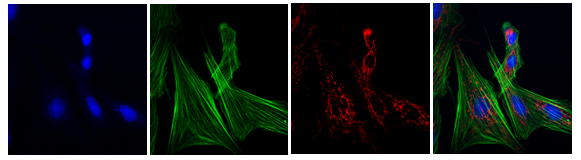
- Abre la imagen y separa los canales.
- Guarda la combinación y los canales por separado en la carpeta “Resultados” con el prefijo (“Merge” o “ChannelNº”) y el nombre original.
- Resultados obtenidos:
- Una imagen de cada uno de los canales por separado en formato RGB.
- Una imagen de Composite (mezcla de todos los canales).
Esta macro permite realizar un contaje de las partículas de una imagen y guardar los resultados en una tabla.
FUNCIONAMIENTO DE LA MACRO:
1º Seleccionar la carpeta donde están las imágenes para contar.
2º Indicar la carpeta donde se guardarán los resultados (Se crea una nueva carpeta “Resultados”).
3º Indicar el formato de las imágenes (tif, lif, lsm, czi, nd2, vsi, ics) y el canal en el que se quiere contar.
Nota: Si alguno de los parámetros no se introducen correctamente la macro lanzará un error y se parará.
- Pasos del tratamiento:
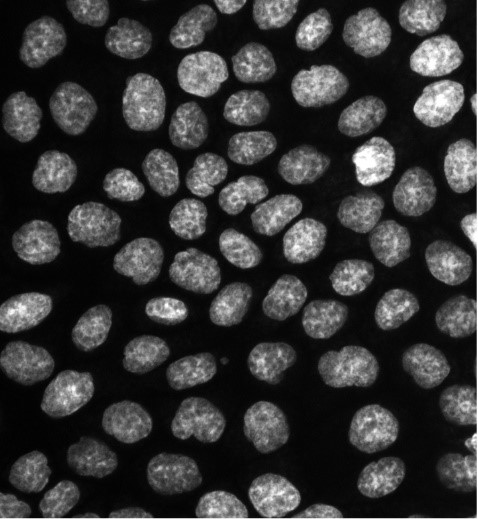
- Duplica la imagen para usarla de máscara.
- Utiliza Subtract Background y el filtro Mean para conseguir una señal más clara.
- Aplica un Threshold para discriminar la señal específica y se crea la máscara.
- Aplica Watershed para separar conjuntos de elementos.
- Usa Analyze Particles para contar las partículas.
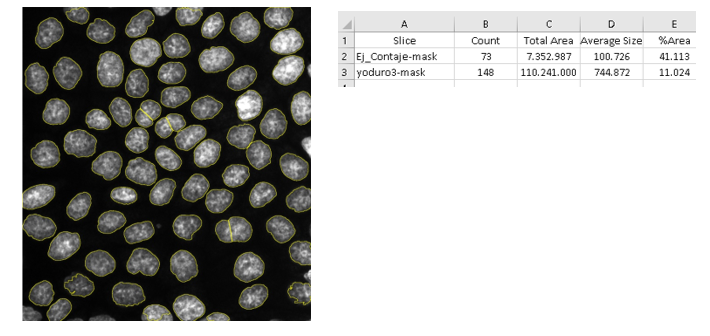
- Resultados obtenidos:
- Una imagen con la selección de partículas contadas.
- Un archivo “Summary.xls” con contaje de cada imagen.
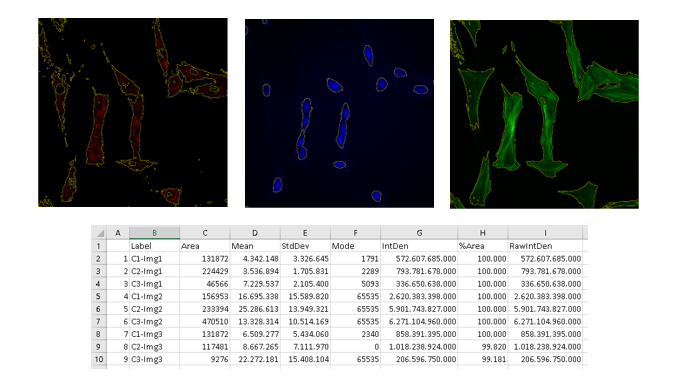
Esta macro permite realizar una cuantificación de la intensidad de señal de las imágenes de una carpeta.
FUNCIONAMIENTO DE LA MACRO:
1º Seleccionar la carpeta donde están las imágenes para cuantificar.
2º Indicar la carpeta donde se guardarán los resultados (Se crea una nueva carpeta “Resultados”).
3º Indicar el formato de las imágenes (tif, lif, lsm, czi, nd2, vsi, ics).
Nota: Si alguno de los parámetros no se introducen correctamente la macro lanzará un error y se parará.
- Pasos del tratamiento:
- Separa los canales (si tiene más de uno) y se analizan por separado.
- Duplica la imagen para cuantificar después sobre ella.
- Utiliza Median para conseguir una señal más clara.
- Aplica Threshold para seleccionar la región a cuantificar y crea una máscara.
- Crea la selección usando la máscara y mide en la imagen original.
- Resultados obtenidos:
- Una imagen por canal con la selección de señal medida.
- Un archivo “Results.xls” con los datos medidos de cada canal por imagen.
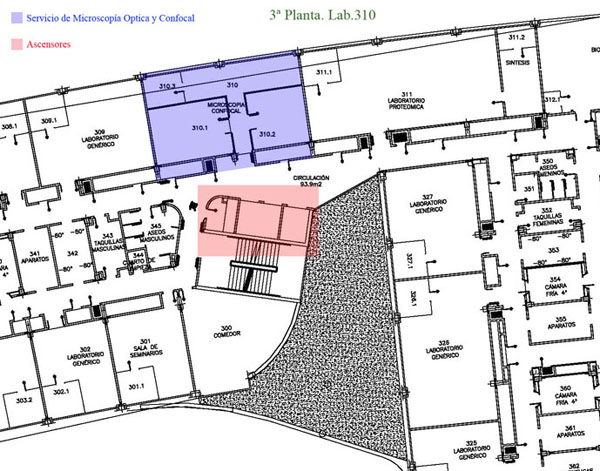
Advanced Light Microscopy Facility (Lab 310)
Centro de Biología Molecular Severo Ochoa (CBM), (CSIC-UAM)
C/Nicolás Cabrera,1
Universidad Autónoma de Madrid. Cantoblanco.
28049. Madrid
Teléfonos:
Despacho: 91 196 4613
Laboratorio 310: 91 196 4643
Laboratorio 336: 91 196 4660
Fax. 91 196 4420
E-mail: smoa@cbm.csic.es
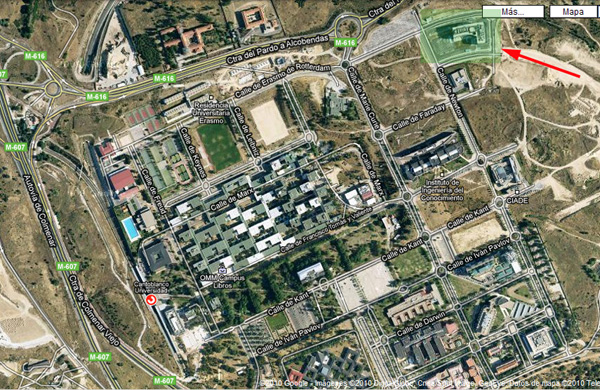
Transporte en la Comunidad de Madrid
Transporte en la U. Autónoma de Madrid
RENFE
Líneas C7, C8 y C10 de Cercanías: Parla-Atocha-Chamartín-Cantoblanco-Alcobendas/S.S. de los Reyes o Colmenar Viejo.
Estación de Cantoblanco.
AUTOBUSES INTERURBANOS